
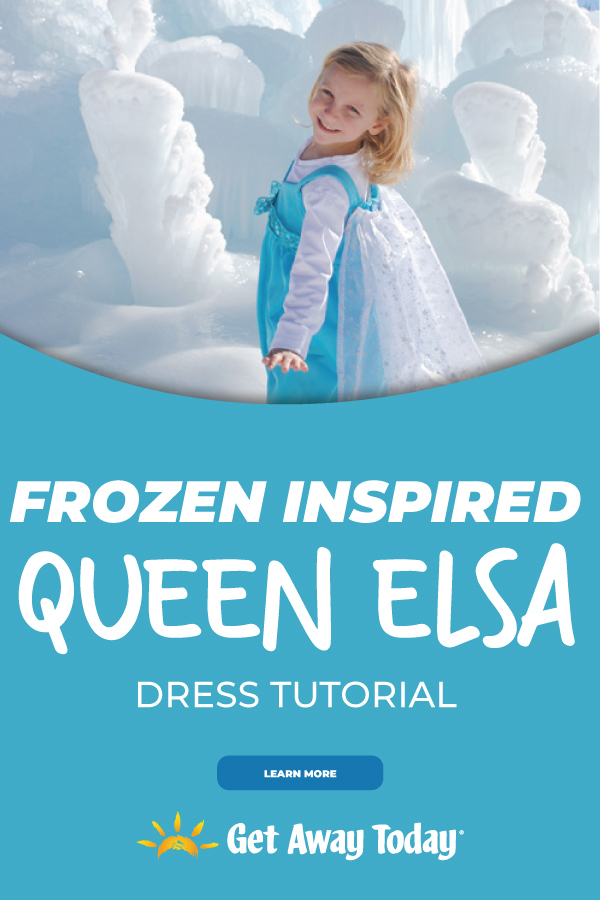
We know that one of the perks of being a little kid is getting to dress up anytime you’d like, whether you're at Disneyland or not! We have some big fans of Elsa around here, so we wanted to create an easy Elsa dress tutorial. It easy enough that someone with basic sewing skills could make one. We had two requirements for the dress:
- Comfortable
- Easy to put on

Supplies Needed for Your DIY Elsa Dress
- 1 Yard Cape Fabric
- 1.5 Yards Dress Fabric
- 8 Inches 1/4 Inch Elastic
- 2 Button Snaps
- 28 Inches Decorative Ribbon
- Matching Thread
Instructions for Your DIY Elsa Dress
First, you'll print the pattern pieces for bodice (front and top) and dress straps. Download free here: Elsa Bodice Front Pattern and Elsa Bodice Back and Straps Pattern.


Clip on the curves around armholes and at the "v" on the front of the bodice. Turn right side out. Insert the straps into the opening on the bodice front, adjust the length for your child, then top stitch it into place.
Cut your straps and fold them in half so they are long and thin. Sew across the seam and turn them right-side out.


Next, attach the straps to the bodice back 1/2" from the armhole, right sides together. (You will attach the front of the straps later.)
Sew the front and back side seams together on both the bodice and the bodice lining.

The skirt is the easiest part! Measure the height of your child from between their shoulder blades to the floor. This will be the length of your skirt.
The width of the skirt is about 44 inches wide. That is the typical width of fabric, so depending on the fabric you purchased, you won't have to cut it.
Our skirt piece was 44" x 27".

Fold the skirt piece in half lengthwise and sew the skirt length together to make a tube. Make sure the right side of your fabric is facing in, so the seam is hidden when you turn it right side out.
Make the center front of your skirt top with a notch, similar to the one you made on the bodice. It will be your guide. This will help you secure the skirt evenly to the bodice after it is gathered. Then, sew a basting stitch around the top. Do NOT back stitch when you do this step because you will be gathering the skirt.
Gently pull the bobbin thread to gather the skirt along the basting stitch. This will make the skirt nice and ruffled. You can cut the bottom of the skirt with pinking sheers instead of hemming the bottom so it doesn’t fray, or you can hem it.
Attach the skirt to the bodice. Tuck the bodice inside the skirt with the right sides facing together. Align the middle point guides so the center points in the front and back are matched. Pin in place. Then, spread out the gathered skirt ruffles so they are evenly spaced around the top.

Sew outside of the basting stitch line to attach the bodice and skirt together.
Cut 8 inches of 1/4 inch elastic and attach it to the back of the inside of the bodice.
Start sewing just inside the strap and continue straight across to the other side. Pull the elastic tight as you sew, so when you are finished it pulls the fabric tight.

Hand sew the button snaps onto the back of the dress. These will be used to attach the cape to the dress. You will sew the other half of each snap to the cape top.

The cape is made from one yard of fabric. You will not need to cut anything! Our fabric was 55 inches wide. Use the width of your fabric to make the length of your cape.
Fold and tuck the edges of the cape fabric and sew. Do this around all four sides of the cape. This will finish all of the edges and prevent fraying.
Then, mark the center of the top of the cape. It is 36 inches wide. Fold the pleats into the fabric tucking from the outside edge towards the center.

Once the pleats are finished, the top of the cape should be about eight inches wide.
Sew the pleats in place with a seam across the top. Hand sew the button snaps onto the top corners of the cape.


Cut a piece of decorative ribbon 14 1/2 inches long. Attach it to the front of the bodice along the skirt. Fold the edge under and sew it to the bodice. Then, sew along the entire bottom edge of the ribbon across the dress. Leave the top free.
To make the bow, cut a nine inch piece of ribbon and fold it into a loop. Sew down the middle to keep it in place. Then, attach it to the dress with a three inch piece of ribbon folded around the bow from top to bottom. Sew down the center ribbon on each edge.


Book Your Disneyland Vacation
Take your princess to the Disneyland Resort for vacation memories that will last longer than winter! Our Disneyland packages and Disneyland tickets are guaranteed to bring you frozen fun without freezing your bank account - and that's a good thing! Book online or call our Disney Experts at 855-GET-AWAY.
Join the Conversation!
Leave A CommentAnonymousAugust 23 2014
super cute! my daughter got one from a couson and now my son want it!!! guess its back to the sewing machine to make an oalof costume:>
AlishaAugust 05 2014
This is super cute! I'm making it today and I'm sure my niece will adore it! Thanks for the bodice patterns! <3
heathJune 11 2014
What are the seam allowances you used? 5/8, 1/2, 1/4 inch ? Are they built into the pattern or do I need to add them in?
Also, there was no inch measurement guide on the pattern to insure that my printer printed it at the correct size. For reference, the straps that printed on my pattern measure about 6 and 3/4 inches in length by about 2 1/2 inches wide--- is that the correct scale?
Thanks so much for this cute pattern. It's very nice to find something that one can make when these things are impossible to find for sale under $$$!
ShalyseMay 12 2014
Thank you so much for your answers! The dress came together nicely! Thanks for the great picture tutorial!
AdelleMay 07 2014
Here are the answers to most of the questions posted above! (Rebecca, I am working on an answer to your question.)
*I used a nylon knit fabric. It was kind of stretchy. *I got the fabric for the dress and the cape for $8. I paid a few dollars for the sparkly ribbon that goes around the waist. So really the dress cost about $10! That's a good deal right?
*It will take about 2 hours to make the dress if you are a basic seamstress. (A little bit longer for a beginner!)
shalyseMay 06 2014
Or do you remember about how long it took you to make it? It is beautiful! I am going to make 2 (one for my daughter and her friend) for my daughter's birthday party. Thanks so much for the tutorial!
ShalyseMay 05 2014
Any idea how much it cost you to make this beautiful dress, with the fabrics you used? I love it! Thanks!
RebeccaMay 03 2014
I'm just a beginner sewer and I am totally confused! How do you get from sewing the bodice pieces together to to pinning the bodice together with right side facing in? You say that I need to make one for the lining and one for the main fabric, but I've already sewn them together. What am I missing? Is the sequence wrong? Help!!
CrystalApril 27 2014
Thank you for sharing your design Adelle! I just sewed one for my daughter yesterday and she LOVES it. By the way, what type of fabric did you use for the dress? It looks very comfortable.
Diann April 26 2014
Thank you for a pattern for this dress. My granddaughter is just in love with Frozen and that is her Birthday Party Theme! So I am going to tackle this dress for her and surprise her with it as her outfit for her party.
AdelleApril 17 2014
Lois, I hope this response isn't too late. I just noticed your question. I am not sure what measurements you need for your alterations, but my daughter that I used in this tutorial measures 22 inches wide around the chest, 11 inches from the top of her shoulder to her waist, 21 inch waist, 22 inches from her waist to feet. You could download the pattern I used and measure it against the dress you are altering. Hope that helps! If not, feel free to ask for additional information.
I am sure your granddaughter will love her dress. What a great present from her Grandma!
LoisApril 06 2014
Making an Elsa dress for granddaughter, she is also a small size 6.....would you by any chance have measurements.....I am altering a used dress. Thank you
ValerieMarch 17 2014
Thank you so much for this tutorial!!! I have very basic sewing skills, will be doing this by hand (I don't own a machine) so hopefully I will be able to do it. I love your two rules, no itchy fabric and can get it on without mom's help. My daughter is the same. She is turning 4 soon and obsessed with Frozen and wants to dress up as Elsa for bday so I am going to attempt it and with your pattern and pieces this will make it so much easier for me. THANKS AGAIN!!!
AdelleMarch 12 2014
The child in this tutorial is 6 years old. She is a small six though. If you are making this dress for a 4 year old you will want to cut the bodice about 1/2 inch smaller on all the sides. If you are using stretchy fabric, you could probably use this pattern to fit your 7 year old. It is very versatile. My 7 (almost 8) year old girl can wear it too and it fits her fine. Just adjust the length of the straps and the length of the skirt to fit her body. I hope that helps! Glad you liked it. My little girl loves having a dress that she can actually play in and it is comfortable. ENJOY!
AnonymousMarch 11 2014
About how large is the child for whom the bodice pattern was made? I need to make two dresses, one about a 4, and the other about a 6X or 7-8 even. What do you suggest for using/adjusting the pattern?
AnonymousMarch 09 2014
Thank you so much for this! I couldn't find anything to help me make an Elsa train for our granddaughter's Frozen birthday party. This was perfect. The snaps were a lifesaver as it isn't a cape and didn't want to sew Velcro on the ice skating costume she was wearing. We glued on jewels to make snowflake designs and hot glued snowflake sequins. She LOVED it!
AnonymousFebruary 20 2014
Thank you for creating a "kid" friendly dress for our girls to play in. It looks to be very easy to construct and will meet the needs of our young Elsa. I really appreciate your efforts. Betty