
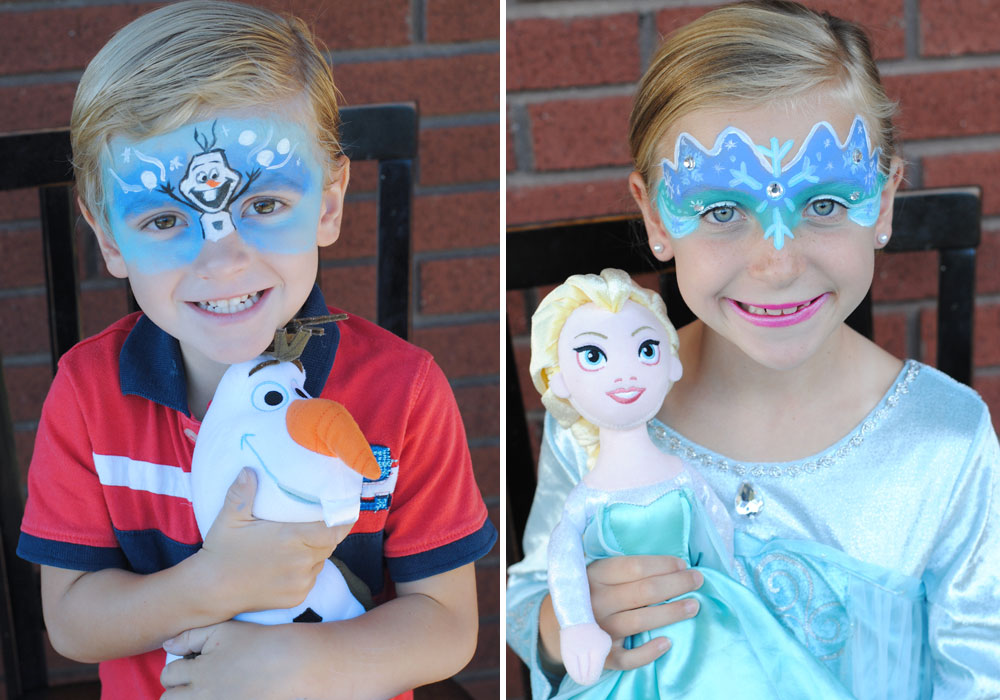
Celebrate Frozen all year long with our cute and easy Frozen face paint tutorial. Learn how to transform your kids (or yourself) into Elsa or Olaf with our easy steps - just in time for Halloween or a Disneyland vacation!
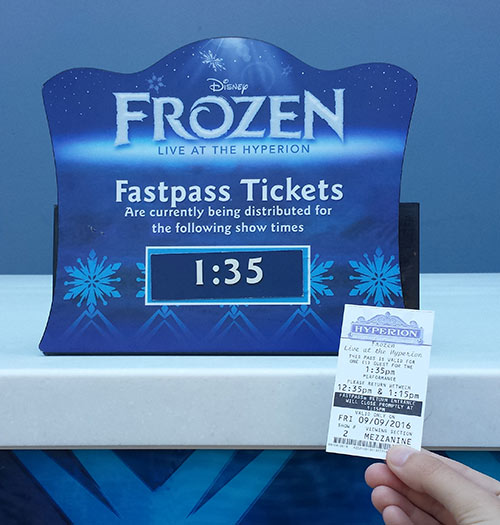
Things are FROZEN all year round at Disney California Adventure Park. The new Broadway style production of Frozen is up and running. The familiar music, beautiful costumes, special effects, and spectacular set are so magical they could thaw any frozen heart. The characters you know and love bring the story to life on the big stage.
Frozen - Live at the Hyperion is free with your park entrance, so be sure to skate on over to see it. You'll want to grab a Fastpass for your show to make sure you get a spot. You won't want to miss it!
With Halloween fast approaching and Frozen - Live at the Hyperion now at Disneyland, I thought it would be fun to put together a Frozen face paint tutorial. I love face paint. It is so easy to apply and it makes such a big statement. A little bit of paint can transform a regular day at the Disney parks into a magical one! And, it takes a Halloween costume to the next level of cool.
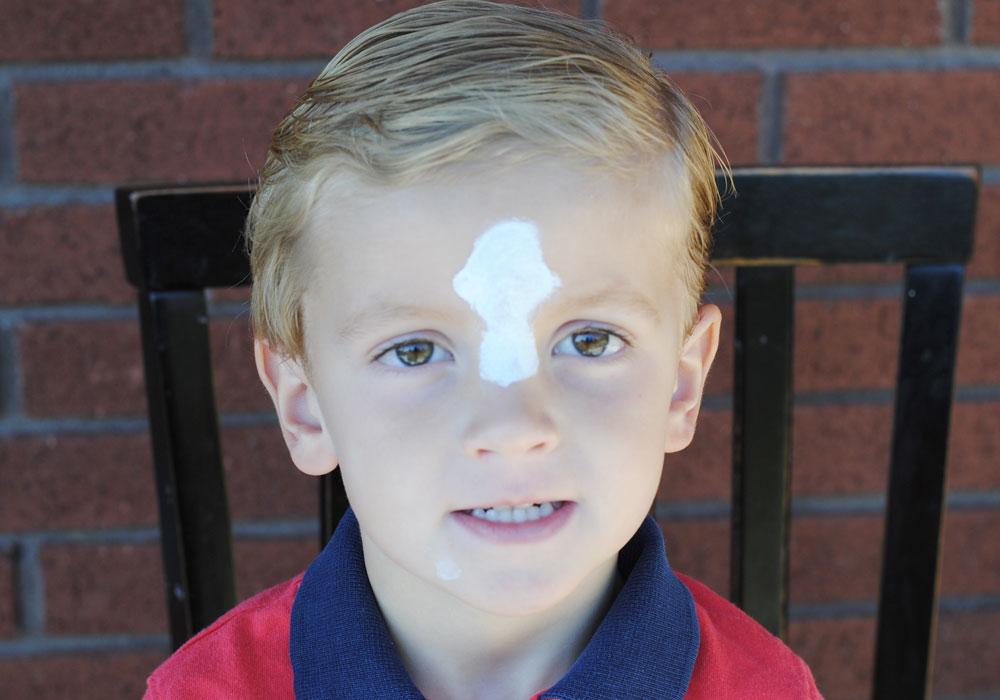
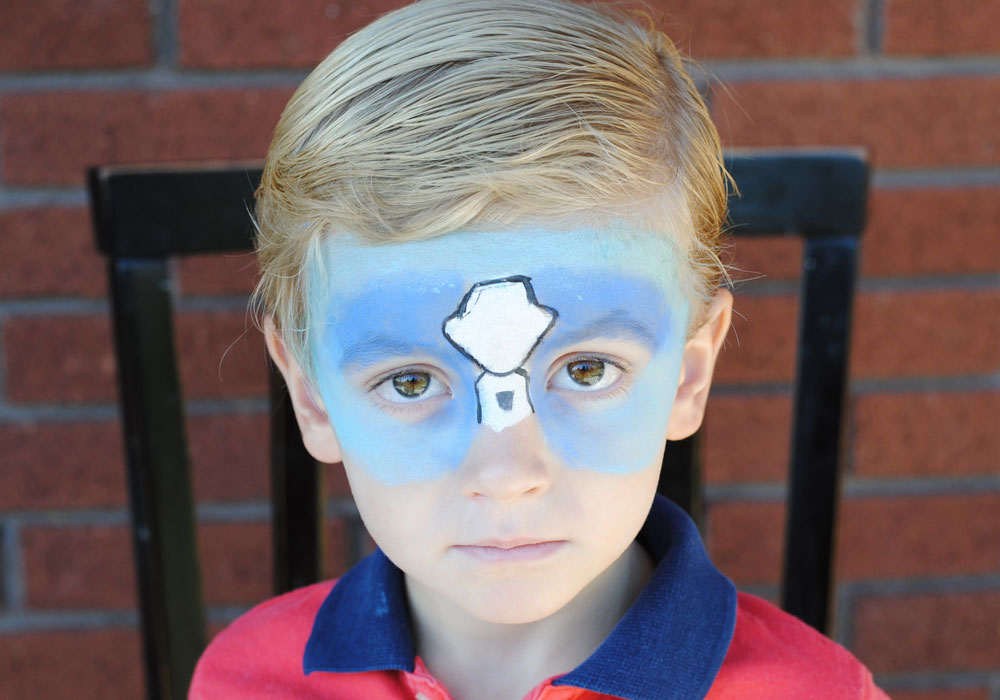
Face painting is easy if you work in layers. Start with the base design and then work up adding details. Let's start with the Olaf design for our Frozen face paint tutorial.
Use white paint to make the Olaf head and body. Dip a sponge into water then squeeze all of the extra moisture out of the sponge. Rub the sponge in the face paint. The water in the sponge will help loosen the paint in the container. It should be kind of like lipstick texture. Sponge the shape onto the face.
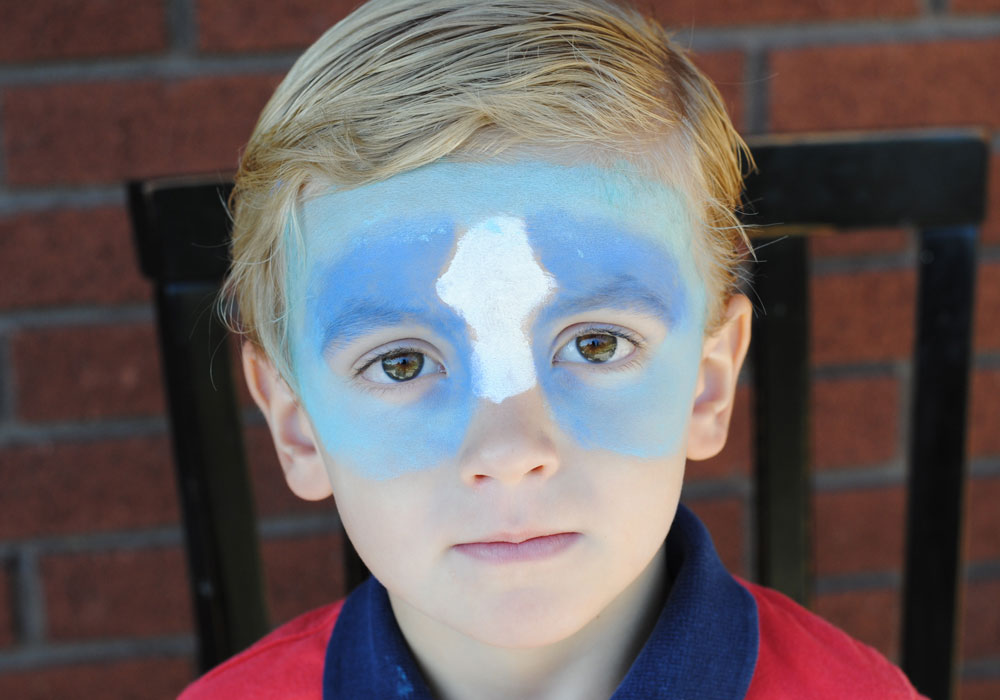
Then, do the same process with the blue color to create a mask look. I used two colors of blue to add some variety! Play with it. You can do whatever you think looks best.
Use a fine paintbrush to add the black outline to Olaf's body and arms. Again, you only need a little bit of water on the brush before you dip it into the paint. Just rub the brush around in the paint until it loosens up with the water and you have a nice thick smooth paint to use. If you make a mistake, you can wipe it away with a damp rag.
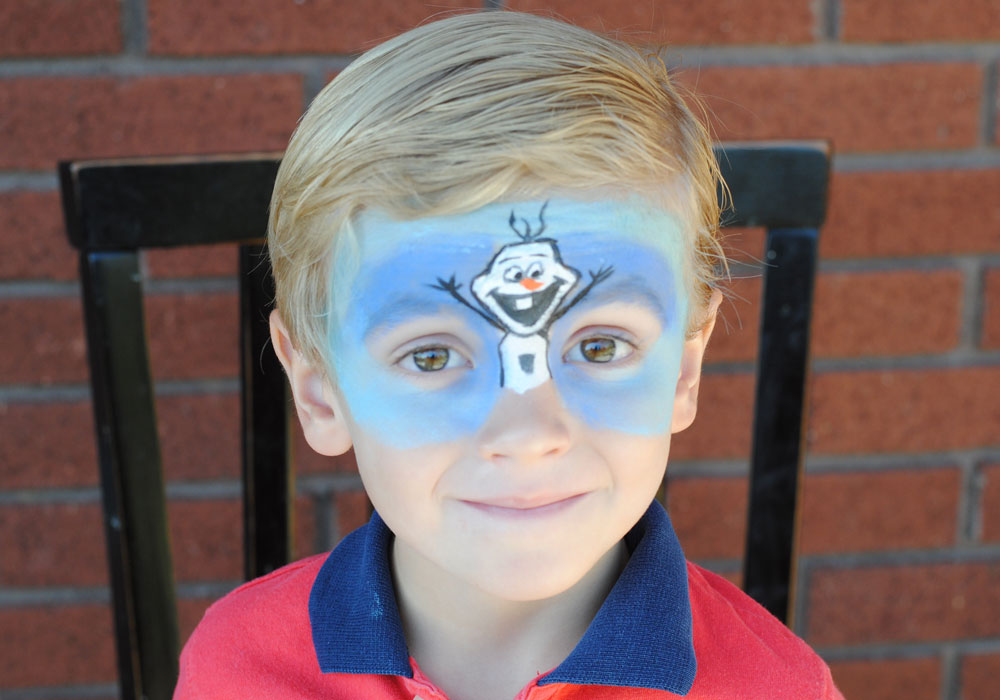
Continue working with Olaf. Add his hair, face, and button.
Then, draw in some snowballs and snowflakes.
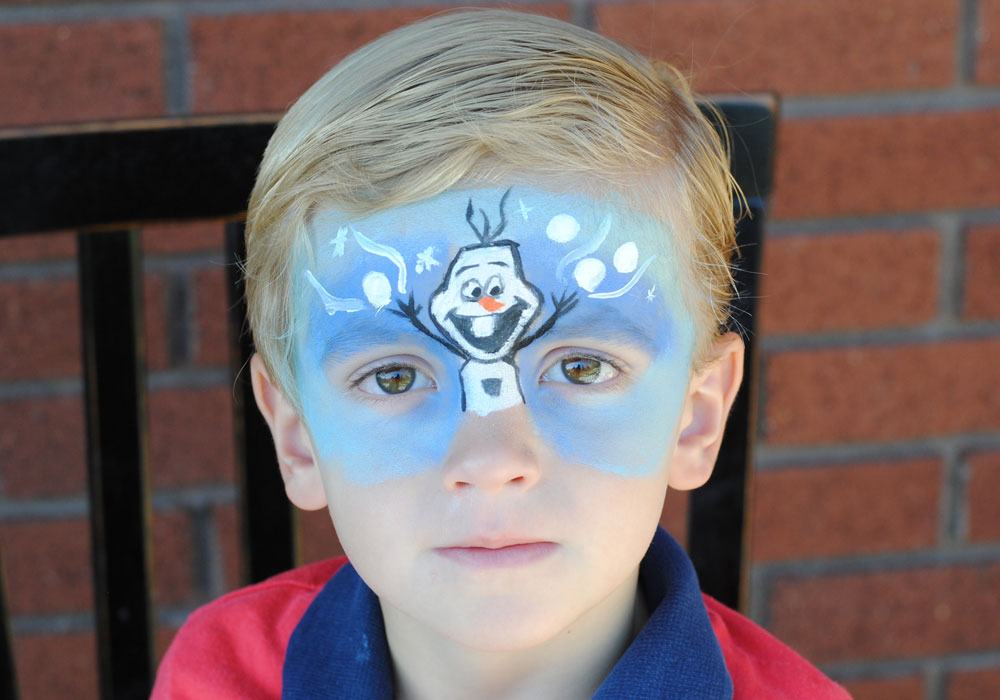
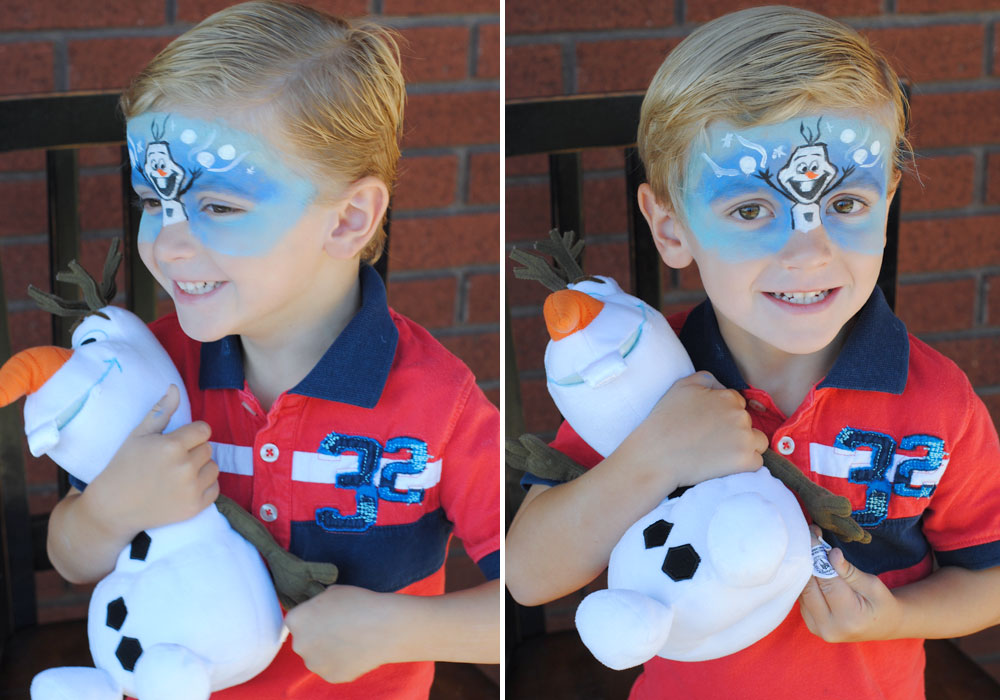
I wanted the design to look good on a boy, so I didn't do anything to frilly. A few snowballs was all my little man wanted. Isn't it the perfect Frozen face paint for boys? It makes me want to give him a nice warm hug!
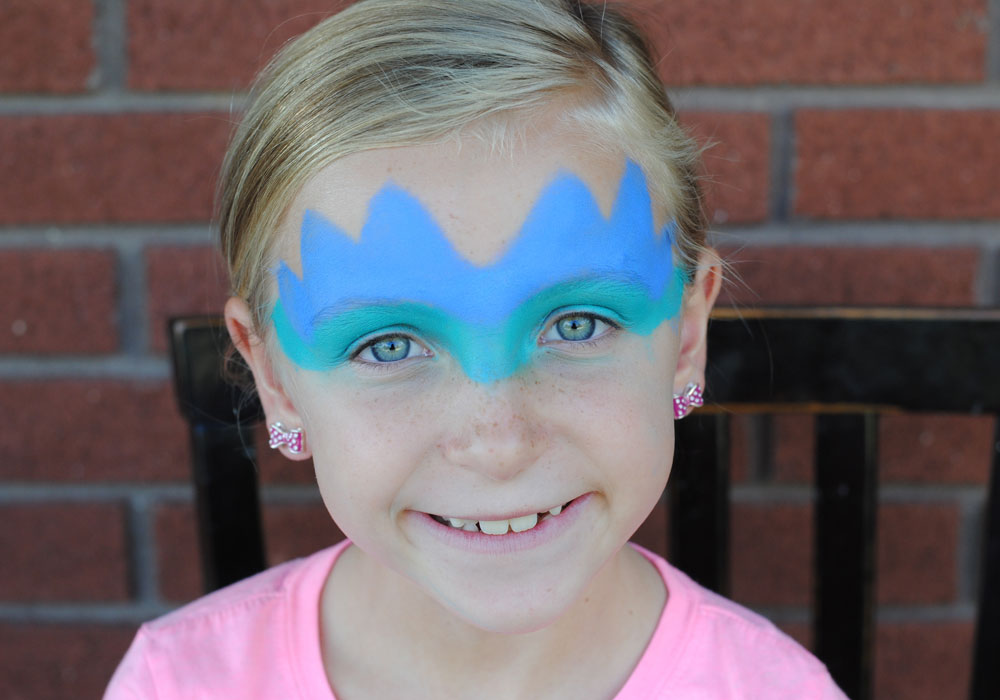
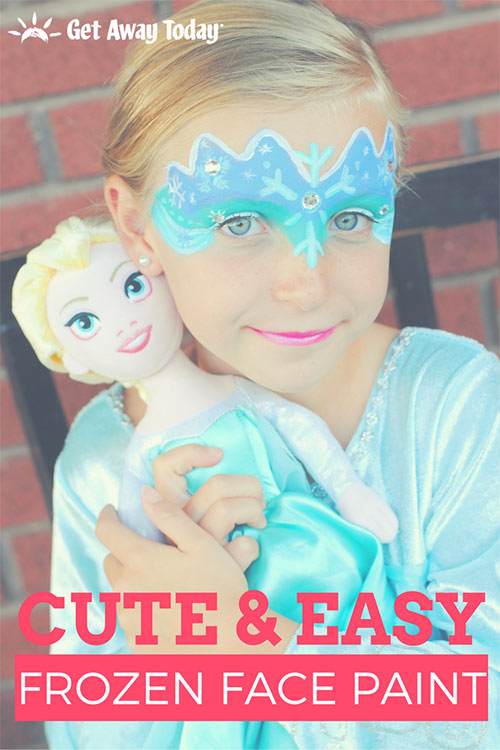
Now let's look at the Elsa design for our Frozen face paint tutorial! I wanted the paint to resemble a crown, because Elsa is a pretty incredible queen. So, start by making a crown shape in the first color of blue using the damp sponge. Dab the color on. Don't try to smear it around. Just lots of quick dabs. Then, add some filler under it with another shade of blue. I used blue and turquoise.
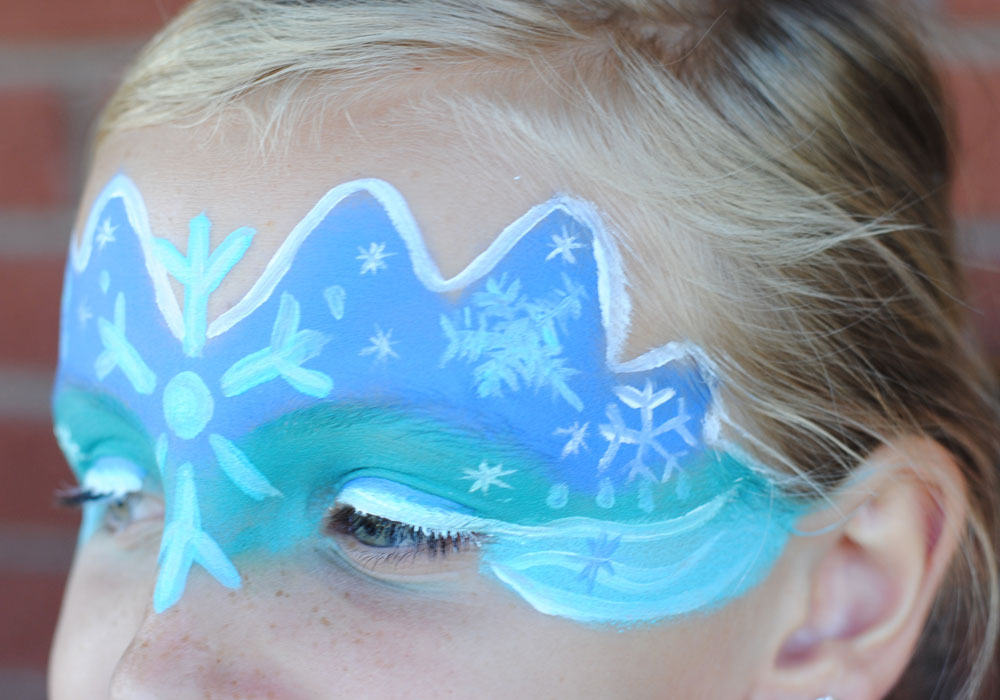
Use the paint brush to draw in a large snowflake on the center of the forehead with the dot between the eyes. Then, add more small snowflakes around on the crown. Outline the crown with white.

I thought it would be fun to let it go a little more and added magic snow swirls across her eyes and then around the face.
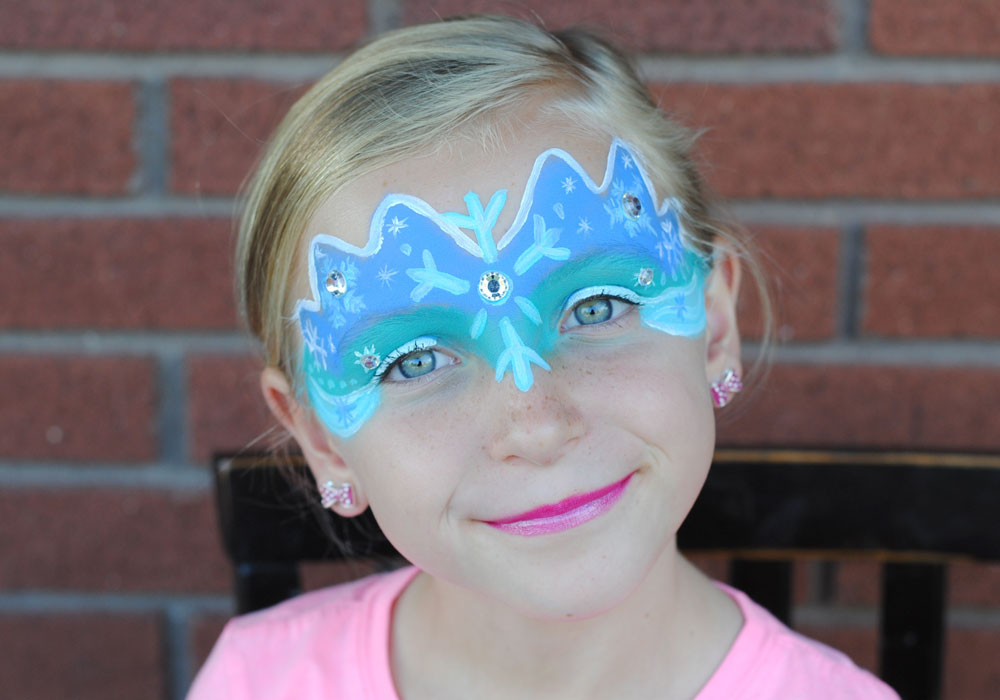
Everyone knows that Elsa likes to sparkle. She built a whole castle out of shimmering ice! So, to complete the crown design, I added some jewels to give it bling! It makes this Frozen face paint tutorial that much prettier.
The gems are flat on the back so you can stick them onto paper, fabric or faces! Apply a little bit of eyelash glue to the back of the jewel and then place it onto the paint. Hold the gem in place for a minute to let the glue set up before you remove the pressure. They stay on really well and the eyelash glue is safe to use on skin and around eyes!
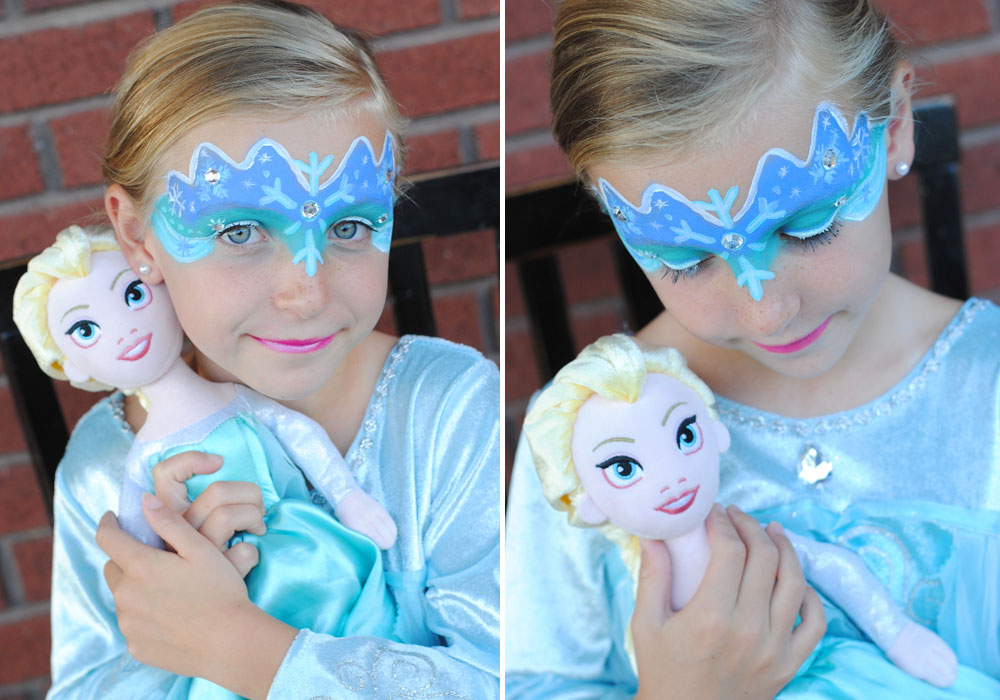
I hope you enjoy making your little ice princess shimmer and sparkle with this Frozen face paint tutorial!
This Frozen face paint is the perfect way to inspire some Disney fun in your home! When you're ready to watch Frozen - Live at the Hyperion, we'd love to help you get there. You won't want to let any of our speicals go! All of our Disneyland packages can be found online, or by calling our agents at 855-GET-AWAY.

Check out these other great articles:

Join the Conversation!
Leave A Comment