
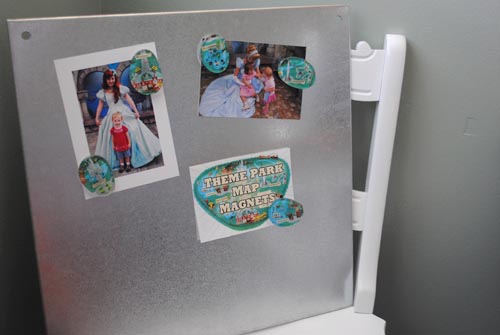
One of my kids' favorite parts of visiting a theme park is becoming the Navigator with the park map. They love to plan out routes and figure out “where we are” about every ten minutes.
The park maps you get at the Disneyland Resort offer loads of helpful tips on where to find kid-friendly food, restrooms, character meet-n-greets and entertainment show times. They can even be used as a makeshift fan to help you cool off while waiting in line. After spending so much time with the park map, it seems sad to throw it away at the end of a fabulous vacation. Instead of tossing that helpful little map into the recycle bin, upcycle it into memory magnets and relive your Disneyland Vacation every time you hang something on your fridge.
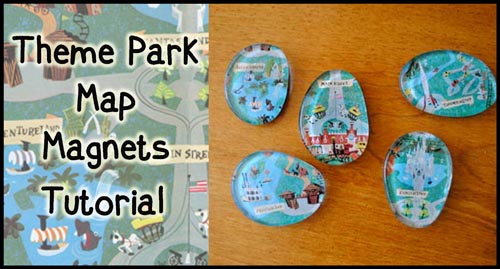
If you have already tossed your park map, or if it got damaged from your own little Navigator’s use, feel free to print a map off the Internet. There are tons of great ones! I found a retro Disney Map from the 1970s that made me very happy. It is the Happiest Place On Earth, right?
Here is how to turn your Theme Park Map into a fun memory keepsake:
Supplies:
• Disney Park Map
• Weldbond Non-Toxic Glue
• Glass Drops (Found at any craft store in many different shapes and sizes.)
• Magnets (Also abundant at craft stores.)
• Gorilla Glue

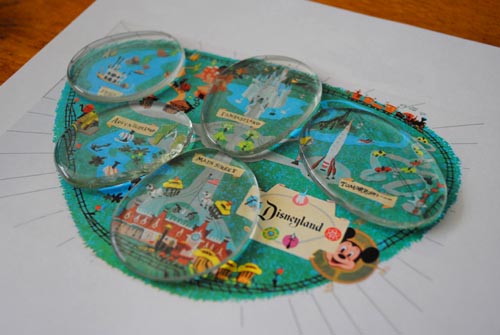
I started by laying out my glass drops onto the map so I could get a feel for where I wanted my magnets to be. Once I felt good about all my locations, I started to glue and cut them out one at a time.
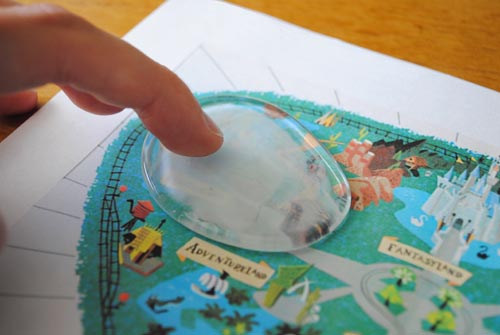
Put a thin layer of Weldbond onto the back of your glass drop and gently smooth it around so it covers the entire surface area.

Place the drop onto the map and press it down firmly. Cut around the edge of the glass drop. The glue will look white at first. Don’t worry! It dries clear.
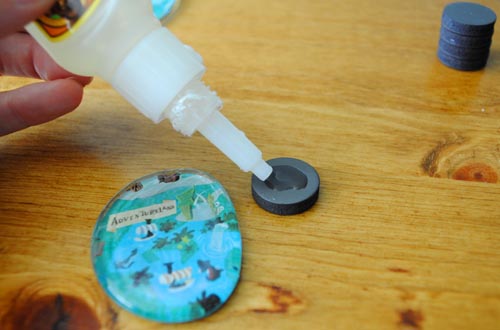
Repeat the process until you have used all of your glass drops. After the glue has dried completely, begin to glue the magnets onto the back of each glass drop. Put a thin layer of Gorilla Glue onto the magnet and then press it to the back of the glass drop. Make sure it sticks on securely. Gorilla Glue tends to “bubble up” as it dries, so keep checking the magnets to make sure they are still attached.
Once your glue has dried, you can use your adorable new magnets to showcase photos from your trip or to hang up your itinerary for an upcoming visit to Disneyland!
I hope these magnets make you as happy as they've made me! We'd love to help you map out your next Disneyland vacation. Take advantage of our special offers and discount tickets to save the most. Book online or call our agents at 855-GET-AWAY.

Check out these great articles:
DIY Vacation ID Bracelet
7 Things All Parents Should Know Before Taking the Kids to Disneyland
Disneyland Resort Hotels - What's the Difference?

Join the Conversation!
Leave A CommentMANDIMarch 07 2015
LOVED IT!
Mariel @ Or so she says..March 04 2014
These are awesome! Adelle, I'm always amazed at the clever Disney ideas you come up with! Pinned. :)