
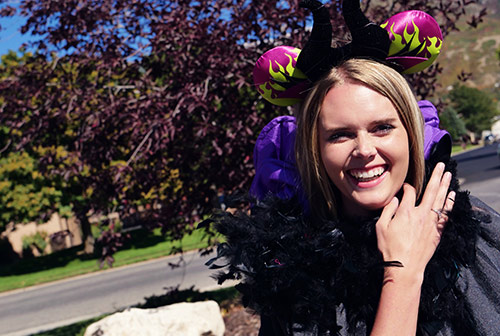
Maleficent is one of the most iconic villains of all time. She is beautiful, haunting and knows how to hold a grudge. Her outfits are as dramatic as her personality, with pointed collars and dark-as-midnight cascading cloaks, she certainly knows how to make a wicked impression.
If you're planning on transforming into the evil fairy this Halloween, this DIY Maleficent costume is the perfect addition to your wardrobe. Follow the step-by-step tutorial below and you won't have to worry about not getting an invitation to all the best parties. No one would dare leave you off the guest list.
Start your DIY Maleficent costume with the main section of the cloak. I found some fun black cloak fabric for this part. It was lightweight and held its shape well. However, you can use any type of fabric that you would like. It just depends on what kind of finished look you want for your cloak.
Cut of the rough edge of the fabric. Fold over the edges and sew down each side with a double folded hem. Then, hem around the bottom edge. You may need to adjust the length depending on your height. However, two yards of fabric was perfect for my height of 5'7".
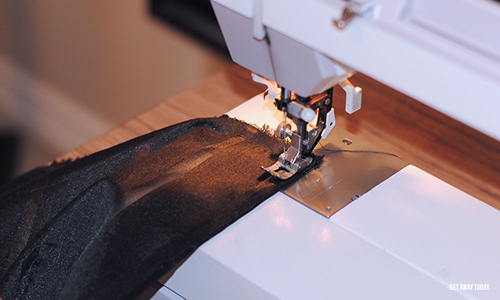
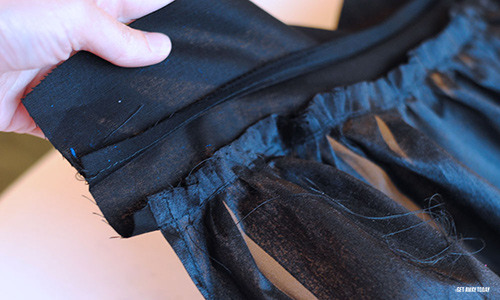
If you have a ruffle foot for your sewing machine, then use the ruffle foot to gather the top of the cloak. If you don't have a gathering foot, sew across the top of the cloak with a wide stitch and then gather the fabric along the bobbin thread by holding on to the bobbin thread and gathering the fabric across it by hand.
Set the cloak aside for a moment.
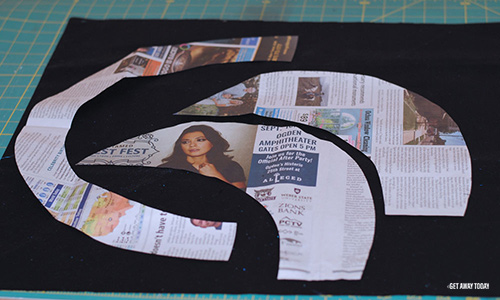
Use the DIY Maleficent costume pattern that is provided here. You will need to print the pages and then cut and assemble the pieces. They are larger than a single sheet of paper, so you may need to print multiple. However, you will need a cloak neck collar pattern and the pointed cloak collar. The cloak neck pattern will need to be doubled. The "fold" is indicated on the pattern.
Lay the black cotton fabric out on a cutting board. Make sure the fabric is folded so you get two pattern pieces with each cut. You should end up with two of the half circle pieces and four of the shark fin shaped pieces.
You will use the same pointed cloak collar pattern to cut out four shapes in purple and four shapes from the stiff interfacing.
Iron all of the parts so they are nice, flat and crease free. Then, stack the layers so that the "right" side of the purple fabric is facing the "right" side of the black fabric. Set those on top of the interfacing. Place some pins in place to keep the layers stacked nicely. You should have four stacked cloak pieces for your DIY Maleficent costume.
Sew up and around the point and back down to connect the layers together. Do not sew across the bottom. You will need it open to turn them right side out.
Turn the pieces right side out and then iron them in place.
Next, you need to sew a little pocket for the wire. When I started this part, I only sewed a pocket on one side of each of the pieces, but after some trial and error, I decided that you really need wire in both sides of each piece.
Sew a line about 1/4 inch inside of the edge starting at the bottom and ending at the point of the collar piece. Then sew a similar line up the other side of the piece.
Slide a wire into each pocket. Cut off any extra wire that hangs out of the pocket.
Set your pointed pieces aside for awhile.
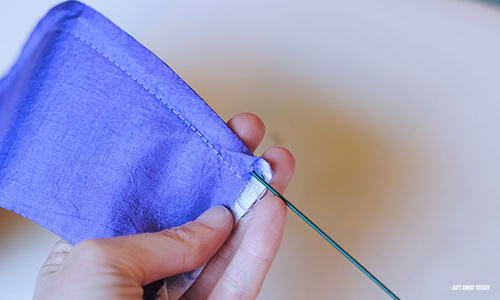
Sew the inside circle of the neck collar segments together. Then, unfold the two parts. Fold them together again with the seam hidden on the inside. Iron it in place.
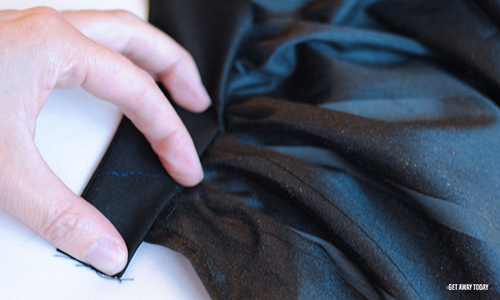
Pin the collar segment onto the top of the cloak with the "right" side of the collar segment laying flat on the under side of the cloak. Make sure to even out the gathered fabric, so it's spread evenly along the neck piece.

Sew the two pieces together where you pinned.
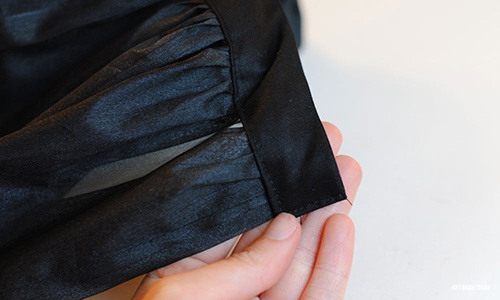
Then, fold the neck segment and bring it to the front of the cloak.
Tuck the unfinished edge under and sew it in place. This should wrap around the top of the cloak fabric.
Be sure to fold the two ends under before you sew across them to make the side finishes nice and clean.
Now, you are ready to add the pointed collar parts to your DIY Maleficent costume. Lay the pieces out on the cloak along the top inside edge. You want them pointing away from the center. Two will point one direction and the other two will point opposite. Pin them in place.
Tuck the bottom edge of the pointed segments inside so that when you sew across it makes a clean finish.
This next part is a little bit tricky, because you don't want to break your sewing machine needle on the wire that is inside each of the pointed collar pieces.
Sew across the bottom of the neck collar attaching the pointed collar pieces as you go across. You will need to stop at each wire and lift the needle over it. Then, continue sewing until you reach the next wire. If you go slow and be careful, you won't have any trouble!
Then, sew across the top edge of the neck collar piece using the same "jump over the wire" strategy as before.
The pointed collar pieces are bendable and shapeable with that wire in them, so you can style them in a lot of different ways when you are wearing your DIY Maleficent costume.
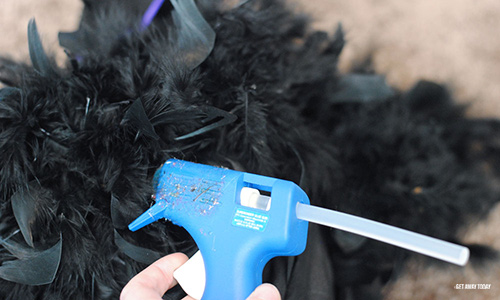
Attach the black feather boa around the top of the cloak. I arranged it by attaching the middle of the feather boa to the center of the back of the cloak. That way the feathers were distributed evenly around the cloak. Glue small dots onto the cloak and secure the boa to the glue in several places so it stays in place.
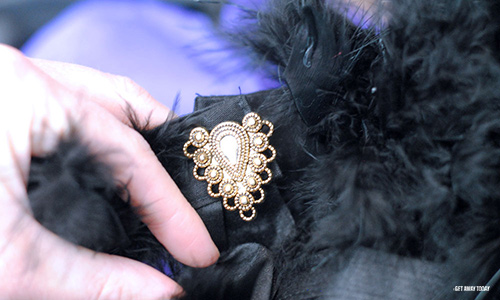
You can add a button to the front of the cloak to keep it secured in the front. Or, just pin it with a safety pin if you want to be quick and easy!
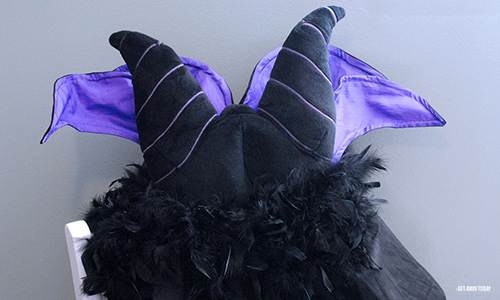
Your DIY Maleficent costume is now complete. You can pair the cloak with a fun Maleficent hat or any other spooky touches. You can usually find additional costume accessories online or at the costume store. I also saw a few tutorials if you want to try your hand at making horns.
There's still time to book your Halloween Disneyland vacation! Or, you can already begin planning to spend next Halloween at the Not-So-Spookiest Place on Earth. Only $175 is required at time of booking when you use our Layaway Plan for any Disneyland package. Combine it with our discount Disneyland tickets and reduced hotel rates, and you'll be screaming at the savings. Book online now or give our Disney experts a call at 855-GET-AWAY.


Join the Conversation!
Leave A CommentGet Away TodayFebruary 06 2020
Susan - Thanks for visiting our site! We don't have a photo, but the feather boa is attached to the top collar of the cloak. We hope this helps!
SusanFebruary 05 2020
Do you have a picture of where feather boa is actually attached? Thanks