
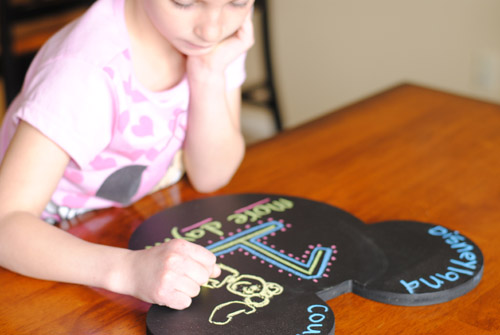
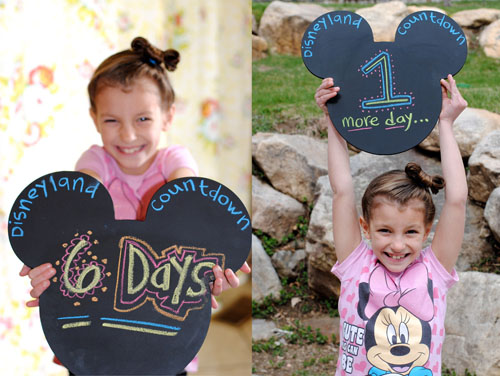
The days leading up to a Disneyland vacation are some of the longest days of the year, so we're always looking for some ways to make them a little bit better. We loved the idea of a countdown that the whole family could look forward to. We made this Chalkboard Mickey Mouse Vacation Countdown and shared it with our friends over on "Or So She Says." It was so popular that today we wanted to share it with you! One of the best things about this countdown is your kids can take turns being in charge of updating the countdown and decorating it. Your whole family will watch the days pass by with chalk doodles and destination departure reminders on the Mickey Board.
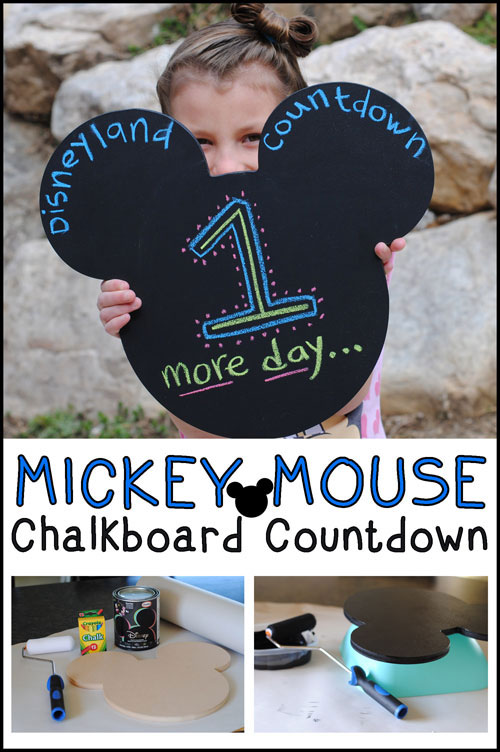
Want to make one? Here is what you will need:
Mickey Mouse Ears Silhouette Wood Board (materials or pre-made)
Chalkboard Paint (or try the Chalkboard Spray Paint)
Colored Chalk
Paint Roller (if using regular chalkboard paint)
You can cut out your own Mickey Ears Board from medium weight MDF (medium-density fiberboard) using a jigsaw. Just draw the shape outline onto the board and cut around the edges. I've found that plates and cups make a perfect Mickey templates in a variety of sizes! If you don't have a jigsaw, you can buy the pre-cut shape from many craft stores, or, order one online. Etsy is a great place to look!
Chalkboard paint is sold at home improvement stores, or you can find it on my favorite - Amazon! You will only need a tiny amount, so buy the smallest quantity of paint you can get unless you see many chalkboard projects in your future.
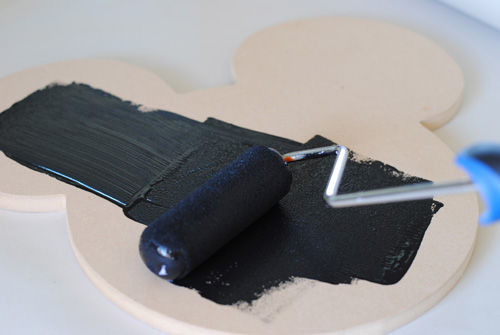
You'll start by covering your working surface to protect it from paint. Roll a thin layer of the chalkboard paint onto the front side of Mickey. Make sure you have a nice even coat of paint across the entire surface.
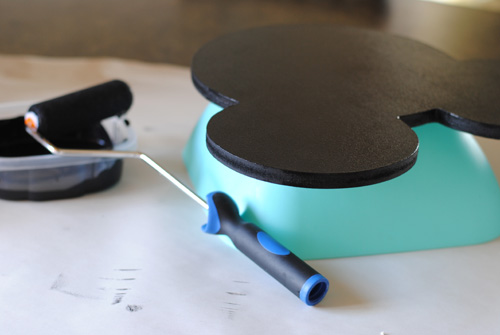
Raise your wooden Mickey above the counter top to paint the edges. I used a bowl to prop mine up, which made it easy to cover the edges without making a mess.
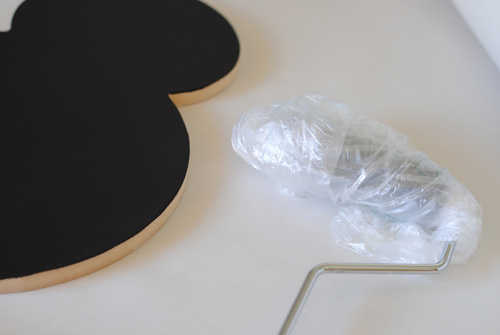
For best results, you will want to apply at least three coats of paint. Wait 30 minutes between coats or until the paint is completely dry to the touch. I like to wrap my roller in a plastic bag to keep it fresh between applications. It saves a lot of rinsing and cleaning.
The manufacturer instructions suggest waiting two days before using chalk on the paint. I got restless and tried it out after a few hours. It seemed to work just fine!
It's that easy! Now, get creative and let the countdown begin!
If you don't have your Disneyland vacation on the calendar yet, what are you waiting for? We'd love to help you get your official countdown going with our vacation specials. Check out our discount Disneyland tickets, reduced hotel rates, 3rd, 4th and 5th night free specials for the best deal. Book online or call our Disney Experts at 855-GET-AWAY!

Check out these other great articles:
20 Things to Make the Most of Disneyland on a Summer Day
Cool Treats at the Disneyland Resort
Disneyland Resort Hotels: What's the Difference?
Disneyland Vacation Countdown Chain

Join the Conversation!
Leave A Comment