
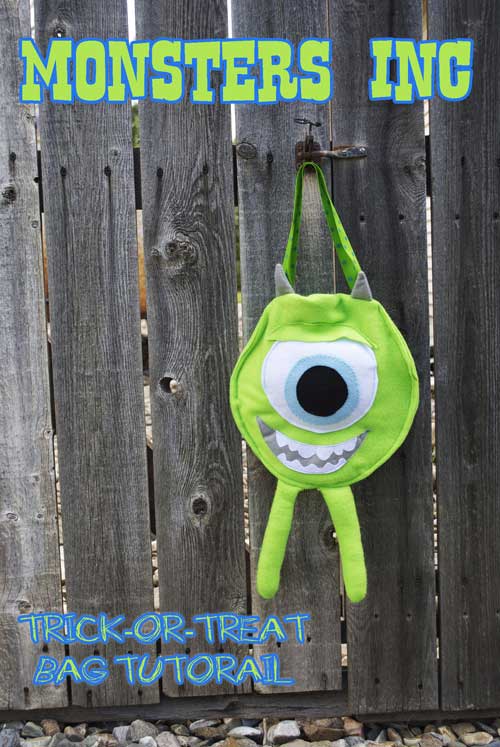
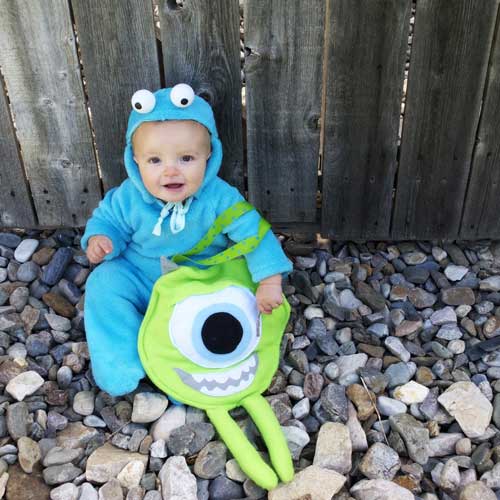
This is not a Trick! Treat yourself to this fun Monsters, Inc. Trick-or-Treat Bag Tutorial and add a little scare to your Halloween Night! Do you know that you can take your kids to Trick-or-Treat at the Disneyland? You can - at Mickey's Halloween Party - a private ticketed event that happens exclusively on select nights during Disney's Halloween Time! Take your new Mike the Monster Trick-or-Treat Bag and dress up in your favorite costume to collect delicious candy throughout park from your favorite Disney Characters dressed in their Halloween best. You can certainly scare up a good time!
Here’s what you need to get started:
• 20 Inches of Bright Green Fleece
• 1 White Felt Square
• 1 Blue Felt Square
• 1 Black Felt Square
• 1 Grey Felt Square
• 1 Yard of Ribbon
• A handful of Polyfil
• Basic Sewing Supplies
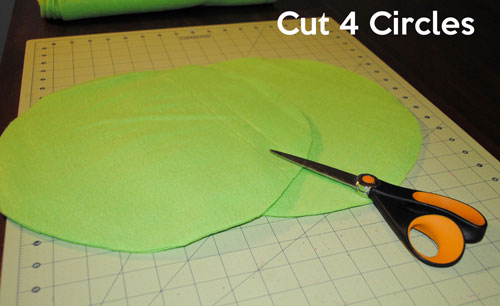
Start by cutting out four green circles 18 inches in diameter. These will be the body and also the bag portion of your tote. I traced around a big bowl to get mine.
Next, print the pattern CLICK HERE TO DOWNLOAD for all of the face elements and the legs. Cut two white eyes, one blue circle, one black circle, one grey mouth, one set of white teeth, and two grey horns, and four green legs.
Now, it’s time to start putting everything together! First, add the grey mouth. Center it on the lower end of your green circle and sew along the edges. Then, add the teeth. The teeth a kind of tricky! The easiest way to attach the teeth is to stick them on with a hot glue gun. Just apply the glue to the back of the teeth and press them onto the grey mouth. You could attempt to sew them on, but it will be rather tedious.
Next, sew the black eye pupil onto the blue iris circle. I like to do a zigzag stitch around the edge to keep it nice and secure.
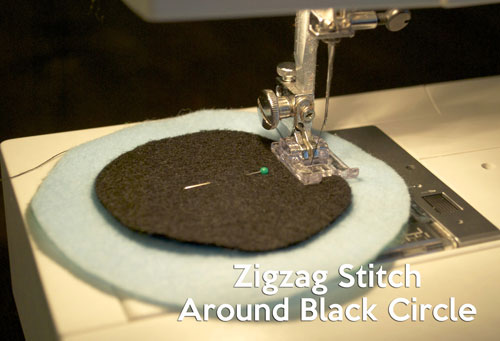
Place them onto the white eye circle. You will want them to be just below the center point so you can add the eyelid later. Sew them onto the white eye using a zigzag stitch like with the previous step. See the picture below:

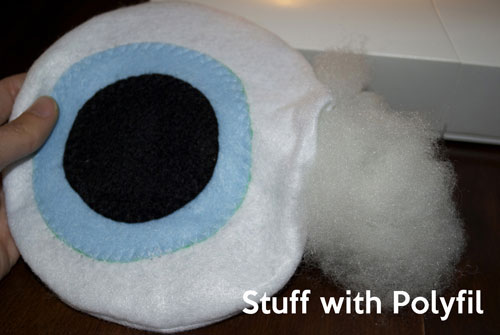
Sew both of your white eye pieces together now. Make sure you place the outside facing in, so you can turn it right side out after you sew! Leave a little opening for turning as well. After you have sewn them together and turned it, fill the eye will some stuffing to make it “pop.”
Turn the open edges under and sew the opening closed.
Pin the eye onto the green face circle. You will want to make sure to use plenty of pins!
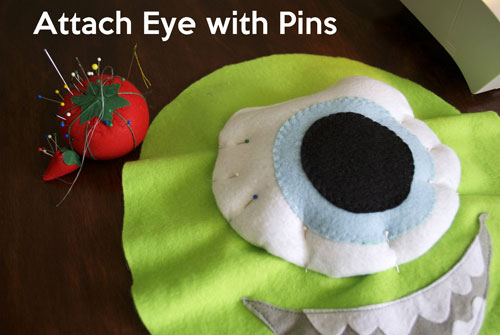
Zigzag around the entire eye.
Attach the eyelid on the top of the eye with pins. Then, sew across the top edge, leaving the part above the eye loose. See picture below:

Sew your horns. Place two grey horn pieces together. Sew the edges leaving the bottom open for turning. Turn it. Do this twice so you have two horns.
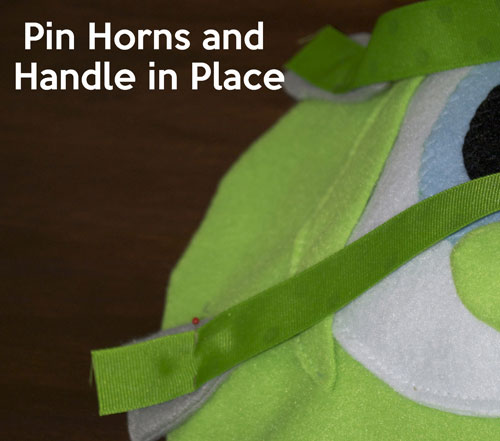
Attach the horns to the top of the monster face facing in towards the eye. Make sure the base of the horn is extending slightly past the edge of the green face circle. This will ensure it gets caught as you sew around the edges later. Cut your ribbon in half to make two handle pieces. Add the first ribbon handle here. The handle should also be directed towards the inside of the green circle. Like this:
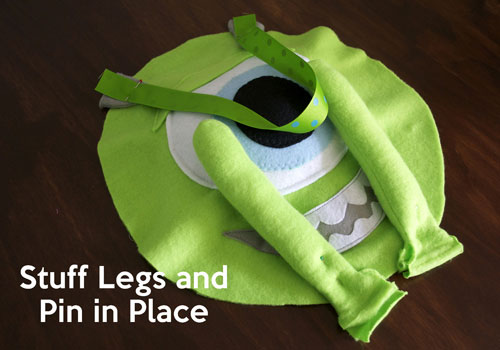
The last part of the monster is the legs. You should have four leg pieces cut. Sew two together to form the leg, leaving the base open for turning and stuffing. Do this twice to make two legs. After the legs have been turned, fill them with polyfil stuffing to make them round and stiff. Leave about an inch at the base flat without filling so you can easily sew them to the monster face.
Pin them to the bottom of the monster face about 2 inches apart and directed towards the center of the face, like this:
Pin your second round green circle to the top of the monster face and pin in place.
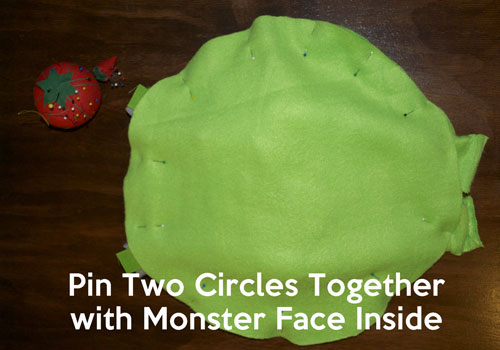
Sew around the edges leaving a hole at the top so you can turn it right side out! Once you have sewn and turned the monster face, sew the opening closed.
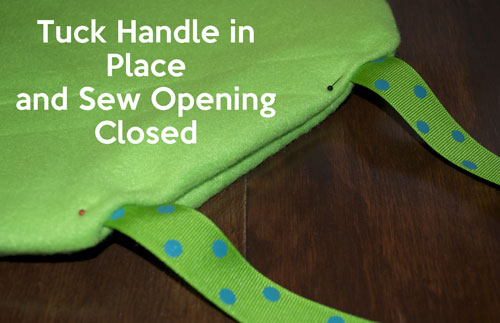
You should have two more green monsters circles left! Sew them together leaving a gap at the top for turning and also to add your second ribbon handle. It will be about 6 inches. Turn them right side out, add the ribbon, and sew the opening closed.
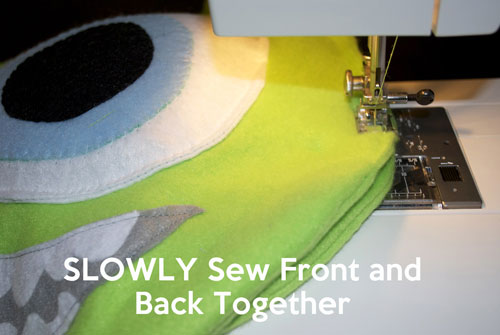
The final step is to sew the two green monster pieces together. You will have to do this very slowly because it will be very thick! You will have to help guide it through as you sew. Just be patient and work it carefully so you don’t break a needle. You will NOT sew across the top because this will be your opening for placing treats inside. Just go around the sides and across the bottom.
That’s it! Don’t worry about making your monster perfect. If the eye is a little crooked or if the legs are not exactly the same size it’s not a big deal. It is supposed to be kind of scary! Have a very Happy Halloween!
And if you haven't booked your Disney's Halloween Time Adventure, there's still time for this year, but you'll want to hurry! Or, if you're really a planner, you can even plan your Halloween trip for next year with just $125 down! Then, just make monthly payments until next year and you're in for a treat when it comes time for your vacation! Having your vacation paid for before you go is a boo-tiful thing!

Check out these other Halloween blog articles:
DIY SeaWorld Inspired Shark Halloween Costume
DIY Alice in Wonderland Halloween Costume
Disneyland Halloween Time 2013
SeaWorld San Diego's Halloween Spooktacular

Join the Conversation!
Leave A Comment