
UPDATED OCTOBER 2024. Halloween Time is one of our favorite times of year at Get Away Today, every year our entire team dresses up and has a blast celebrating at the office. But on top of that we also love exploring all the thrilling and chilling Halloween happenings in Southern California and in Orlando.
If you’re going to Oogie Boogie Bash at Disneyland, Mickey’s Not So Scary Halloween Party at Magic Kingdom, Brick or Treat at LEGOLAND or any of the other frightfully fun events this fall, chances are you’re going to need a costume!
DIY Costumes at a Glance
Over the years our teams at Get Away Today have had a ton of fun coming up with various costumes and group Halloween costumes to wear to the office. Here are some of our favorites of the years that can give you a quick idea at a glance.

DIY Alice in Wonderland Costume
Here is what you'll need to make your own Alice in Wonderland Costume:
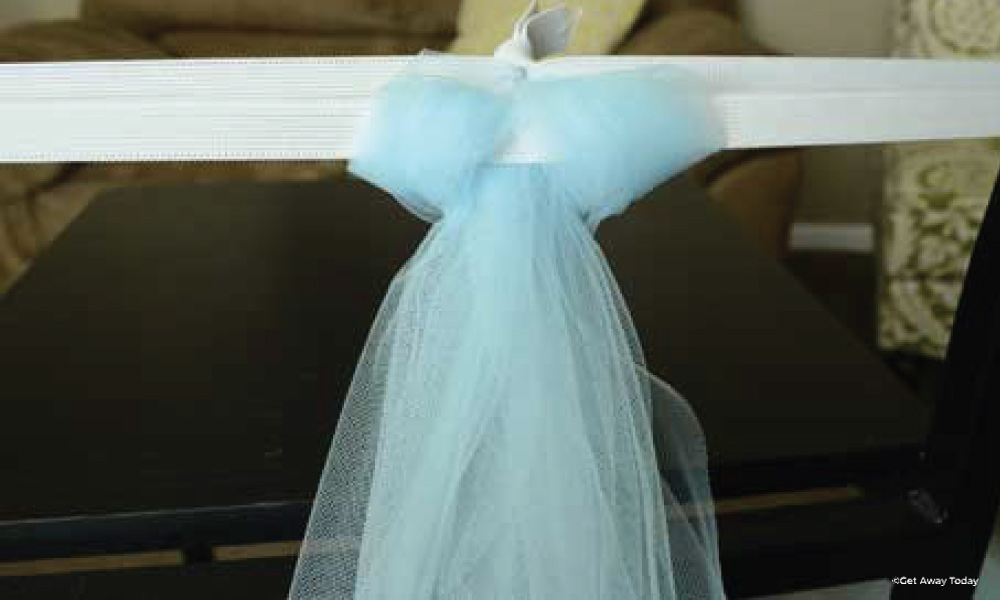 Continue this with all of your strips until they're gone or you're satisfied with the fullness of your skirt. Make sure you space the tulle evenly around the waistband. If you want a fuller skirt, just use more strips.
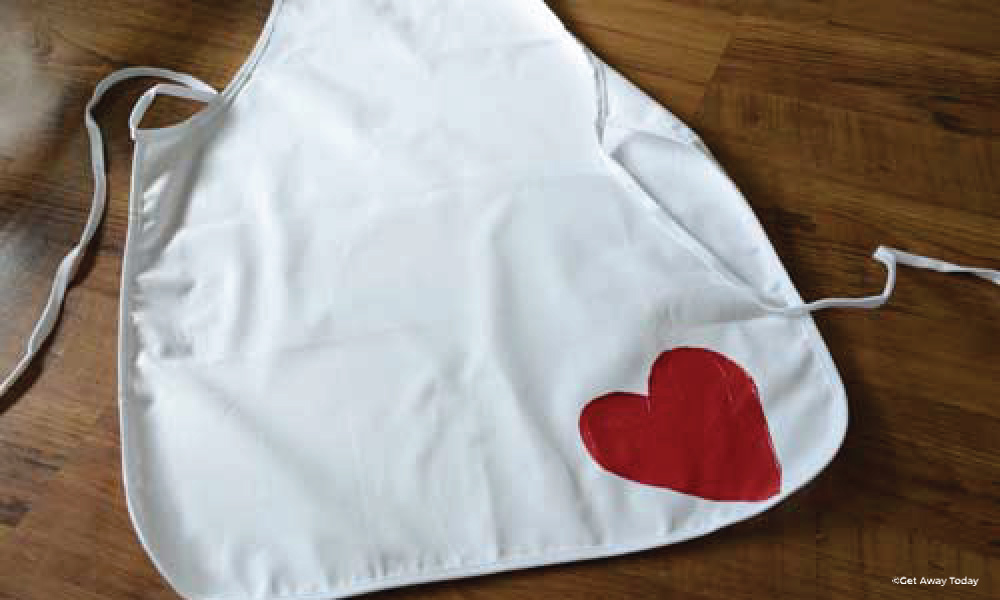
When we finished tying the skirt, we painted a red heart on the apron to add a pop of color to the costume.
Continue this with all of your strips until they're gone or you're satisfied with the fullness of your skirt. Make sure you space the tulle evenly around the waistband. If you want a fuller skirt, just use more strips.
When we finished tying the skirt, we painted a red heart on the apron to add a pop of color to the costume.
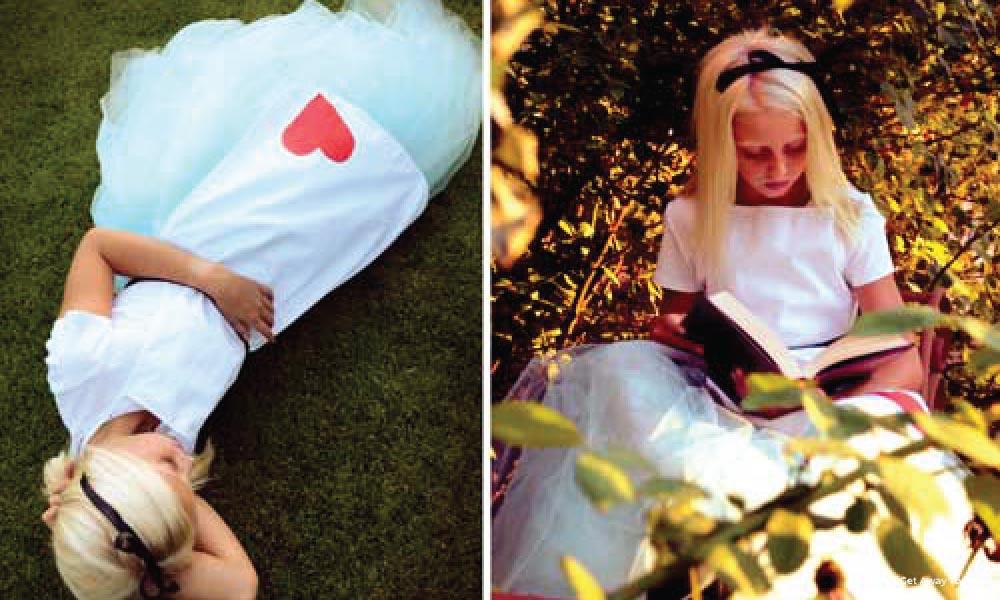
 When that's done, you can just have fun dolling it up. We used some floppy black ribbon and tied it around the apron and used the same ribbon for Alice's hair. She just wore some black shoes and a white t-shirt that she already had. If you wanted some other accessories, you could add a stuffed white rabbit, a pocket watch or any other Alice in Wonderland inspired items you already have!
This is a really fun and easy Halloween costume and it could easily be adjusted for any of the Disney princesses just by changing the colors of tulle and accessories. I hope this gives you some inspiration for your Halloween costumes.
When that's done, you can just have fun dolling it up. We used some floppy black ribbon and tied it around the apron and used the same ribbon for Alice's hair. She just wore some black shoes and a white t-shirt that she already had. If you wanted some other accessories, you could add a stuffed white rabbit, a pocket watch or any other Alice in Wonderland inspired items you already have!
This is a really fun and easy Halloween costume and it could easily be adjusted for any of the Disney princesses just by changing the colors of tulle and accessories. I hope this gives you some inspiration for your Halloween costumes.
- 20 yards of light blue tulle (this is for an older child with a longer skirt - you could use about half this amount for a smaller child)
- Elastic
- Measuring tape
- Sharp scissors
- Apron
- Fabric paint
- Black ribbon
- T-shirt, light blue or white will look the best
Continue this with all of your strips until they're gone or you're satisfied with the fullness of your skirt. Make sure you space the tulle evenly around the waistband. If you want a fuller skirt, just use more strips.
When we finished tying the skirt, we painted a red heart on the apron to add a pop of color to the costume.
When that's done, you can just have fun dolling it up. We used some floppy black ribbon and tied it around the apron and used the same ribbon for Alice's hair. She just wore some black shoes and a white t-shirt that she already had. If you wanted some other accessories, you could add a stuffed white rabbit, a pocket watch or any other Alice in Wonderland inspired items you already have!
This is a really fun and easy Halloween costume and it could easily be adjusted for any of the Disney princesses just by changing the colors of tulle and accessories. I hope this gives you some inspiration for your Halloween costumes.
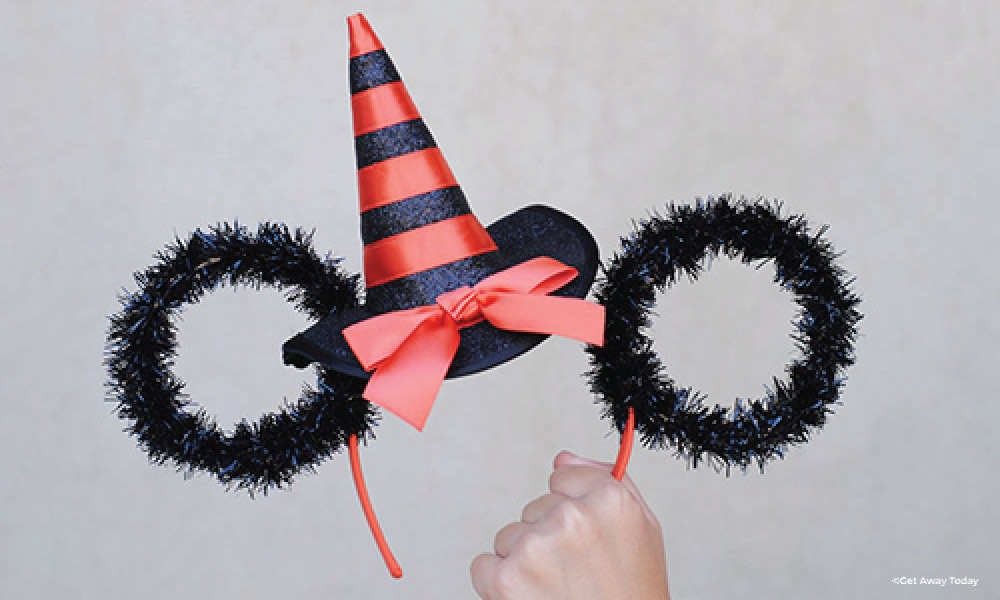
DIY Minnie Mouse Halloween Ears
We love a simple costume and in under 10 minutes you can transform into a Minnie Mouse witch for Halloween. These cute and easy ears are sure to dress up your Halloween look with a bit of Disney magic.
Minnie Mouse is one of the most popular Disney characters. She is cute, sweet and completely lovable. Just ask Mickey! She also loves to dress up. During Halloween Time at the Disney Parks, Minnie trades in her polka dots for new frightfully fun garb and for several years she was featured as Witch Minnie. She’s always wickedly adorable in her costume.
To make your Halloween Minnie Ears, you will need:
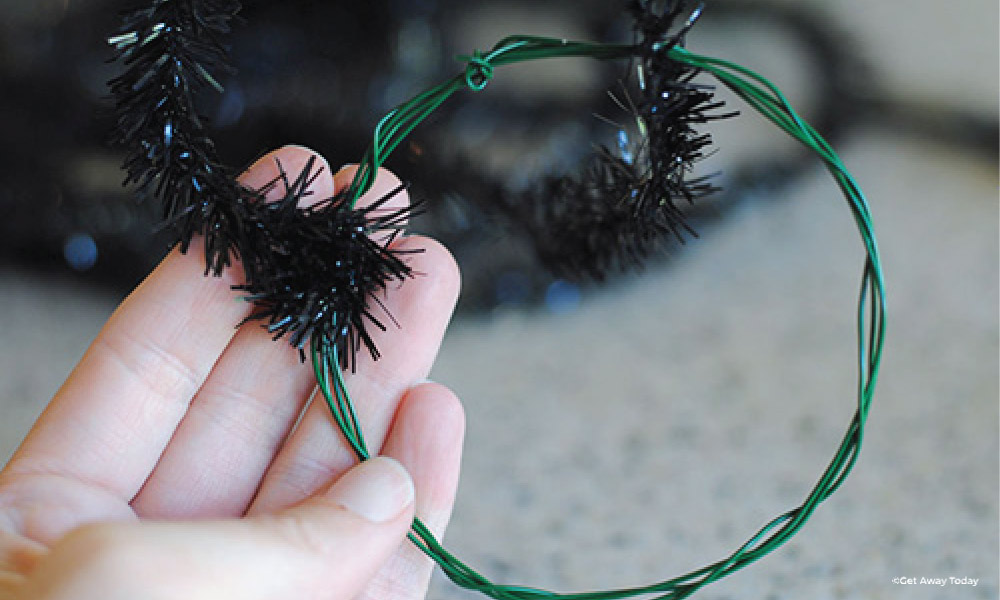 If you have leftover tinsel after you’ve wrapped the entire loop, you can cut it off with the wire cutters. Make sure to leave about 5 inches of leader tinsel attached. You will need it for the next step. Attach the ear to the witch hat headband by wrapping the extra 5 inches of tinsel around the headband. Wrap it tight and then tuck the end up in the ear tinsel so it doesn't poke your little witch's head when she wears it!
Repeat the step on the second Minnie Mouse ear. The witch hat headband that we found had the hat attached on the side of the headband. It is not in the center but it does add an extra step to adding the second ear, though. You have to cut a slit in the hat so that it can lay over the ear.
Place the ears on the headband so they are centered and look even. Then, find the spot on the hat that needs to be slit.
Take your scissors and cut a piece of the hat fabric out. Keep the cut out piece!
Lay the hat over the ear so it lays naturally. You can leave it just like this if you want. If your hat fabric frays, you can use fray glue to prevent it from getting crazy. But, if you want a totally finished look, then add these extra steps. Cut a small piece of black sticky felt that is just bigger than the slit you cut from the hat.
Peel off the back of the felt so it reveals the sticky side and place it on the underside of the hat brim. It should cover the hole from the bottom. The sticky side is facing up towards the slit. Then, replace the little hat piece that you cut out earlier. Stick it to the felt. If you want some extra sticky help, place a little blob of hot glue on the felt before you attach the hat piece back in place.
Your adorable Halloween Minnie Ears are ready for a party! Don’t forget Disneyland and Walt Disney World are hosting some pretty spooktacular Halloween parties during Halloween Time. Mickey's Not-So-Scary Halloween Party happens in Disney World while Oogie Boogie Bash happens at Disneyland Resort.
No matter which one you choose to visit, we’d love to help get you there. You can book your Disney vacation online now or by giving our travel experts a call at 855-GET-AWAY. Our discount Disneyland tickets and reduced hotel rates will have you screaming from excitement!
If you have leftover tinsel after you’ve wrapped the entire loop, you can cut it off with the wire cutters. Make sure to leave about 5 inches of leader tinsel attached. You will need it for the next step. Attach the ear to the witch hat headband by wrapping the extra 5 inches of tinsel around the headband. Wrap it tight and then tuck the end up in the ear tinsel so it doesn't poke your little witch's head when she wears it!
Repeat the step on the second Minnie Mouse ear. The witch hat headband that we found had the hat attached on the side of the headband. It is not in the center but it does add an extra step to adding the second ear, though. You have to cut a slit in the hat so that it can lay over the ear.
Place the ears on the headband so they are centered and look even. Then, find the spot on the hat that needs to be slit.
Take your scissors and cut a piece of the hat fabric out. Keep the cut out piece!
Lay the hat over the ear so it lays naturally. You can leave it just like this if you want. If your hat fabric frays, you can use fray glue to prevent it from getting crazy. But, if you want a totally finished look, then add these extra steps. Cut a small piece of black sticky felt that is just bigger than the slit you cut from the hat.
Peel off the back of the felt so it reveals the sticky side and place it on the underside of the hat brim. It should cover the hole from the bottom. The sticky side is facing up towards the slit. Then, replace the little hat piece that you cut out earlier. Stick it to the felt. If you want some extra sticky help, place a little blob of hot glue on the felt before you attach the hat piece back in place.
Your adorable Halloween Minnie Ears are ready for a party! Don’t forget Disneyland and Walt Disney World are hosting some pretty spooktacular Halloween parties during Halloween Time. Mickey's Not-So-Scary Halloween Party happens in Disney World while Oogie Boogie Bash happens at Disneyland Resort.
No matter which one you choose to visit, we’d love to help get you there. You can book your Disney vacation online now or by giving our travel experts a call at 855-GET-AWAY. Our discount Disneyland tickets and reduced hotel rates will have you screaming from excitement!
- Witch Hat Headband
- Black Wired Tinsel
- Craft Wire
- Glass Cup or Can
- Scissors
- Wire Cutters
- Sticky Black Felt
If you have leftover tinsel after you’ve wrapped the entire loop, you can cut it off with the wire cutters. Make sure to leave about 5 inches of leader tinsel attached. You will need it for the next step. Attach the ear to the witch hat headband by wrapping the extra 5 inches of tinsel around the headband. Wrap it tight and then tuck the end up in the ear tinsel so it doesn't poke your little witch's head when she wears it!
Repeat the step on the second Minnie Mouse ear. The witch hat headband that we found had the hat attached on the side of the headband. It is not in the center but it does add an extra step to adding the second ear, though. You have to cut a slit in the hat so that it can lay over the ear.
Place the ears on the headband so they are centered and look even. Then, find the spot on the hat that needs to be slit.
Take your scissors and cut a piece of the hat fabric out. Keep the cut out piece!
Lay the hat over the ear so it lays naturally. You can leave it just like this if you want. If your hat fabric frays, you can use fray glue to prevent it from getting crazy. But, if you want a totally finished look, then add these extra steps. Cut a small piece of black sticky felt that is just bigger than the slit you cut from the hat.
Peel off the back of the felt so it reveals the sticky side and place it on the underside of the hat brim. It should cover the hole from the bottom. The sticky side is facing up towards the slit. Then, replace the little hat piece that you cut out earlier. Stick it to the felt. If you want some extra sticky help, place a little blob of hot glue on the felt before you attach the hat piece back in place.
Your adorable Halloween Minnie Ears are ready for a party! Don’t forget Disneyland and Walt Disney World are hosting some pretty spooktacular Halloween parties during Halloween Time. Mickey's Not-So-Scary Halloween Party happens in Disney World while Oogie Boogie Bash happens at Disneyland Resort.
No matter which one you choose to visit, we’d love to help get you there. You can book your Disney vacation online now or by giving our travel experts a call at 855-GET-AWAY. Our discount Disneyland tickets and reduced hotel rates will have you screaming from excitement!
DIY Shark Costume for SeaWorld or Finding Nemo
Under the Sea, we’re inspired by so many creatures and theme parks from The Little Mermaid to SeaWorld San Diego to Finding Nemo. This fun Shark Hoodie Tutorial is perfect for those looking for a simple way to take a bite out of their Halloween costume list!
What makes the Shark Hoodie so awesome? It’s warm—for those chilly October nights. It’s easy—even beginning crafters can tackle this project! It is practical—little tikes can wear this versatile jacket even when the costume parades and trick-or-treating come to an end! Plus, your kids will fit right in when you take them to meet their finned friends at SeaWorld - and don't forget, kids get a free ticket to SeaWorld with each adult ticket purchased for travel in October!
Shark Hoodie Supplies
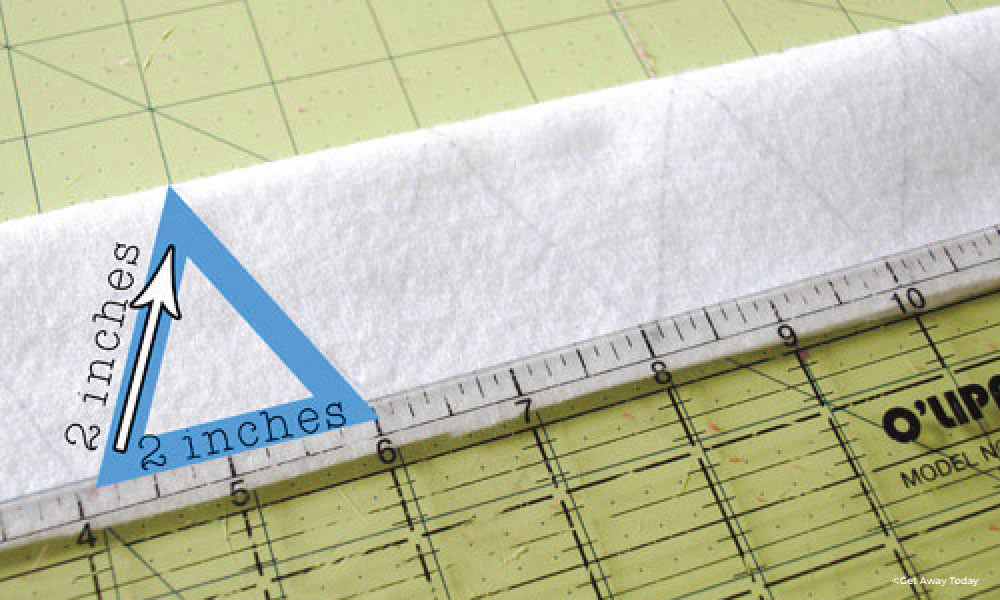 We sewed the teeth together before cutting them. Sew along your pattern and then use your scissors to cut along your sew line. Make sure to cut the right part of your fabric off! You want to be able to turn them right-side out.
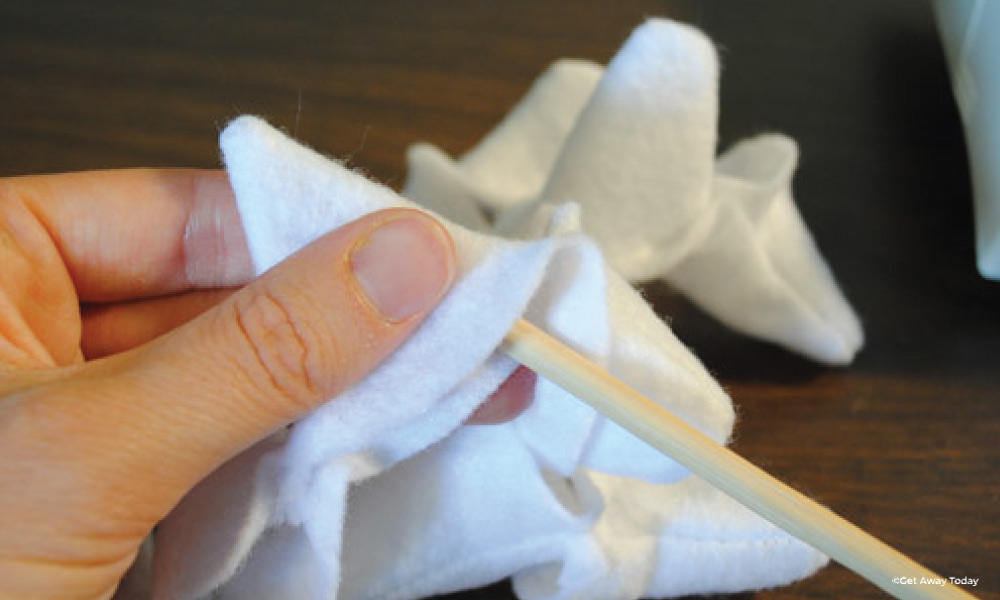
Turn the teeth and push the points out.
We sewed the teeth together before cutting them. Sew along your pattern and then use your scissors to cut along your sew line. Make sure to cut the right part of your fabric off! You want to be able to turn them right-side out.
Turn the teeth and push the points out.
 Sew the teeth into the red bias tape. We used a zig-zag stitch.
Attaching Shark Teeth to Your Hoodie
Sew the teeth into the red bias tape. We used a zig-zag stitch.
Attaching Shark Teeth to Your Hoodie
Then attach your bias tape to the inner lining of your jacket hood. It is a good idea to pin your teeth in place before you begin to sew. Take a moment to center your teeth in the hood and make sure the ends are even at the base of the jacket. I recommend changing the color of thread to match your jacket on the outside. We used gray thread.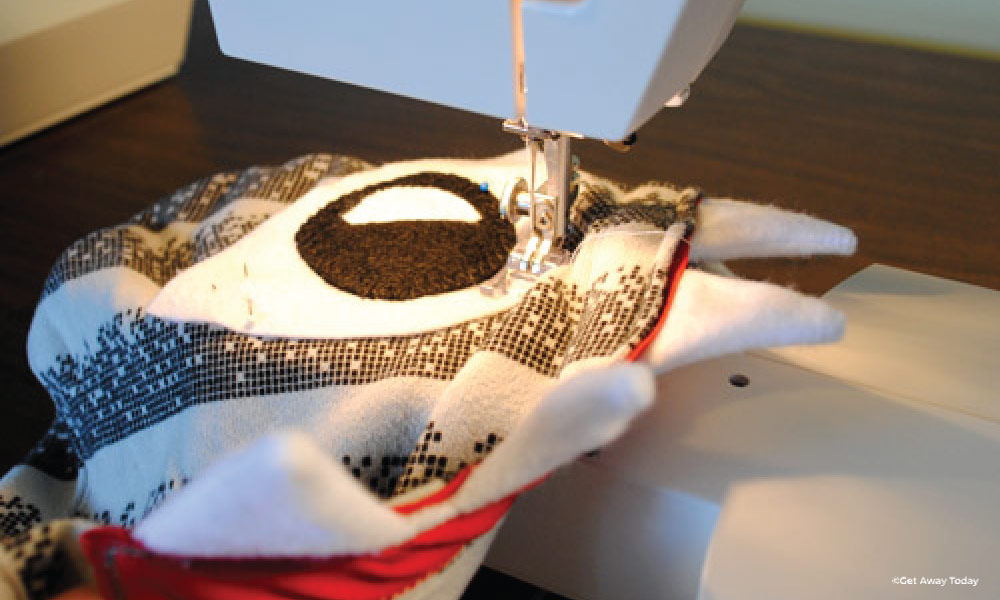 Next, it’s time to add the eyes! What is a shark without that spooky gleam in his eye? Create the eye pieces and pin the layers in place and sew them together using a zig-zag stitch along the edges, or you could glue them with a glue gun if you want.
Sew the eye onto the outside of the hood. You want them to be slightly angled and positioned towards the top front of the hood. Don’t worry too much about placement. We just kind of ‘eyeballed’ it and they turned out fine!
If you are using this fun hooded jacket as a part of your California Adventure, you might want to stop at this point. Your little travelers can wear their shark jackets to SeaWorld, the beach and anywhere else your adventures take you. How fun would that be?
If you are making a costume, then we suggest adding a removable fin onto the back. It adds to the “sharkiness” and makes it fun to circle around the floor looking for carpet surfers and such.
Cut the fin out of gray felt and sew the two sides together leaving the bottom open. Stand your fin up and cut a piece of fabric to act as the base. It will be the shape of a long hot dog bun. Sew two snaps onto the base. Add one to the top and one to the bottom. This is how you will attach your fin to your jacket.
With your fin still inside out, pin it to the base (your snaps will be facing in!) and then sew around the edge, leaving a small hole to turn it.
Turn and stuff your fin with polyfil. Then sew up the hole by hand.
You are almost done! Sew the second half of the snaps to the back of the jacket. Make sure you have them centered. After you sew on the top snap, set the fin onto the jacket to mark the location for the second and lower snap. This will ensure a good fit.
We like the idea of attaching the fin with snaps because it makes the costume so versatile and practical. Simply remove the fin when you are riding in the car, or using the jacket for regular non-costume party activities.
You can use this idea to make all kinds of fun toothy animals. It would be easy to make a Monster for your Monsters Inc fan or how about a Polar Bear or a T-Rex? The possibilities are endless. We hope you have fun transforming a regular jacket into a scary costume for your little Halloween Spooks!
Next, it’s time to add the eyes! What is a shark without that spooky gleam in his eye? Create the eye pieces and pin the layers in place and sew them together using a zig-zag stitch along the edges, or you could glue them with a glue gun if you want.
Sew the eye onto the outside of the hood. You want them to be slightly angled and positioned towards the top front of the hood. Don’t worry too much about placement. We just kind of ‘eyeballed’ it and they turned out fine!
If you are using this fun hooded jacket as a part of your California Adventure, you might want to stop at this point. Your little travelers can wear their shark jackets to SeaWorld, the beach and anywhere else your adventures take you. How fun would that be?
If you are making a costume, then we suggest adding a removable fin onto the back. It adds to the “sharkiness” and makes it fun to circle around the floor looking for carpet surfers and such.
Cut the fin out of gray felt and sew the two sides together leaving the bottom open. Stand your fin up and cut a piece of fabric to act as the base. It will be the shape of a long hot dog bun. Sew two snaps onto the base. Add one to the top and one to the bottom. This is how you will attach your fin to your jacket.
With your fin still inside out, pin it to the base (your snaps will be facing in!) and then sew around the edge, leaving a small hole to turn it.
Turn and stuff your fin with polyfil. Then sew up the hole by hand.
You are almost done! Sew the second half of the snaps to the back of the jacket. Make sure you have them centered. After you sew on the top snap, set the fin onto the jacket to mark the location for the second and lower snap. This will ensure a good fit.
We like the idea of attaching the fin with snaps because it makes the costume so versatile and practical. Simply remove the fin when you are riding in the car, or using the jacket for regular non-costume party activities.
You can use this idea to make all kinds of fun toothy animals. It would be easy to make a Monster for your Monsters Inc fan or how about a Polar Bear or a T-Rex? The possibilities are endless. We hope you have fun transforming a regular jacket into a scary costume for your little Halloween Spooks!

- 1 Hooded Jacket
- White Felt
- Black Felt
- Grey Felt
- Red Double Sided Bias Tape
- 2 Snaps
- Polyfil
- Thread/Sewing Supplies
We sewed the teeth together before cutting them. Sew along your pattern and then use your scissors to cut along your sew line. Make sure to cut the right part of your fabric off! You want to be able to turn them right-side out.
Turn the teeth and push the points out.
Sew the teeth into the red bias tape. We used a zig-zag stitch.
Attaching Shark Teeth to Your HoodieThen attach your bias tape to the inner lining of your jacket hood. It is a good idea to pin your teeth in place before you begin to sew. Take a moment to center your teeth in the hood and make sure the ends are even at the base of the jacket. I recommend changing the color of thread to match your jacket on the outside. We used gray thread.
Next, it’s time to add the eyes! What is a shark without that spooky gleam in his eye? Create the eye pieces and pin the layers in place and sew them together using a zig-zag stitch along the edges, or you could glue them with a glue gun if you want.
Sew the eye onto the outside of the hood. You want them to be slightly angled and positioned towards the top front of the hood. Don’t worry too much about placement. We just kind of ‘eyeballed’ it and they turned out fine!
If you are using this fun hooded jacket as a part of your California Adventure, you might want to stop at this point. Your little travelers can wear their shark jackets to SeaWorld, the beach and anywhere else your adventures take you. How fun would that be?
If you are making a costume, then we suggest adding a removable fin onto the back. It adds to the “sharkiness” and makes it fun to circle around the floor looking for carpet surfers and such.
Cut the fin out of gray felt and sew the two sides together leaving the bottom open. Stand your fin up and cut a piece of fabric to act as the base. It will be the shape of a long hot dog bun. Sew two snaps onto the base. Add one to the top and one to the bottom. This is how you will attach your fin to your jacket.
With your fin still inside out, pin it to the base (your snaps will be facing in!) and then sew around the edge, leaving a small hole to turn it.
Turn and stuff your fin with polyfil. Then sew up the hole by hand.
You are almost done! Sew the second half of the snaps to the back of the jacket. Make sure you have them centered. After you sew on the top snap, set the fin onto the jacket to mark the location for the second and lower snap. This will ensure a good fit.
We like the idea of attaching the fin with snaps because it makes the costume so versatile and practical. Simply remove the fin when you are riding in the car, or using the jacket for regular non-costume party activities.
You can use this idea to make all kinds of fun toothy animals. It would be easy to make a Monster for your Monsters Inc fan or how about a Polar Bear or a T-Rex? The possibilities are endless. We hope you have fun transforming a regular jacket into a scary costume for your little Halloween Spooks!
And don't forget, you can take your school of sharks to SeaWorld for FREE all month long in October! SeaWorld is the perfect place to show off that shark hoodie, but it's fun to wear at home, too! Book your Kids Free San Diego vacation today online or by calling our reservation specialists at 855-GET-AWAY.

Join the Conversation!
Leave A CommentAnnaMay 30 2014
Hi Anonymous, A lot of it depends on the length of her waist to ankle and how thick you want her skirt. You could still make a great skirt with 20 yards, but you probably wouldn't need a whole lot more to be a little thicker. 25 yards would probably be a pretty safe bet. Thanks and good luck! I'd love to hear how much you ended up using!
AnonymousMay 24 2014
Hi Anna, do you know how much more tulle I would need for a 5'3 girl with a 29 inch waist?
LauraFebruary 27 2014
Very nice and easy to do costume. Also very well described with nice pictures. Tanks for sharing