We're sorry but your browser doesn't support some of the newer web features we take advantage of. In order to use this site please consider installing the latest version of one of the following browsers:

DIY Mickey Tie Dye Shirts
July 9, 2015
Author: Adelle Belnap
0 Comments


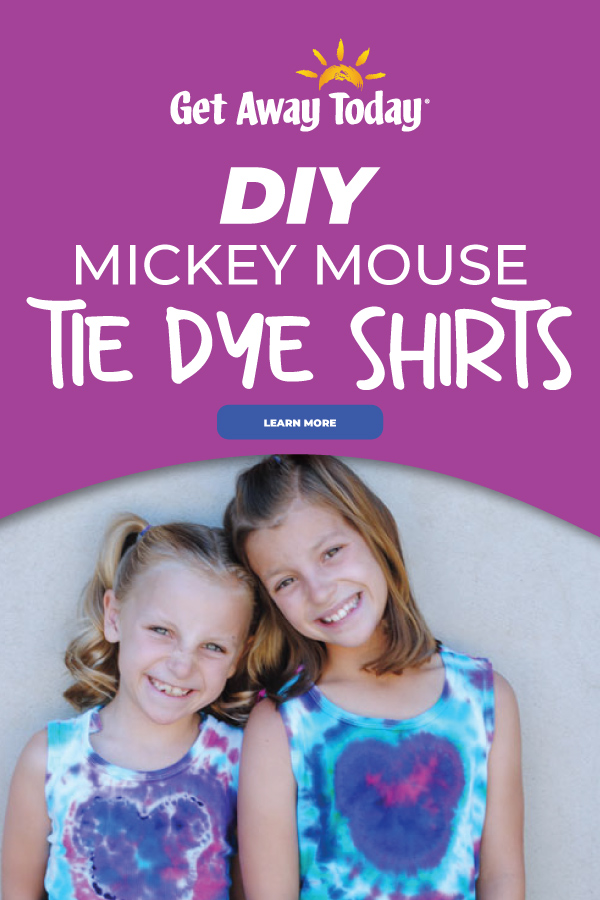
One of my favorite traditions for a Disneyland vacation is when families wear matching shirts. Wearing coordinating apparel identifies the group as a whole, makes adorable photographs, and helps keep everyone together. There are plenty of ways to be creative with shirt design. This idea was inspired by a photograph I saw of a friend's family at Disneyland! They made their own tie dye Mickey shirts as an activity before their trip. The colorful shirts looked so cute, I had to give it a try myself. Plus, they reminded me of two of the brightest shows ever to be seen at Disneyland, World of Color Celebrate and the new Paint the Night Parade!


Tie Dye Mickey Shirts

Making your own tie dye Mickey shirts is such a fun stay-at-home activity, perfect for warmer weather. You can wear your shirts on your next Disney vacation, or just when you're hanging out at home. It would be fun to make matching PJs with this Mickey shirt tutorial!

Tie Dye Supplies

Start with a shirt that is made of 100% Cotton. Wash the shirt in hot water.


Tie Dye Mickey Shirt Prep

Do not put the shirt in the dryer. You want to do the project with a wet, but not soaking shirt. Print out the Mickey silhouette and cut out the size that you want to use on your project. Trace the pattern with a pencil onto your shirt.


Thread a needle with thick wax dental floss. Sew around the Mickey shape using small tight stitches. Use a simple down and up stitch all the way around.


Pull the ends of the dental floss tight so that the Mickey shape gathers into a tight ball. Make sure all of the fabric is pulled to the front on the shirt and that it is not gathered up under the floss. Tie the floss into a tight knot.


Bunching Up the Shirt

Then put a small piece of plastic around the edge of the Mickey shape. And secure it in place with several tight rubber bands. I cut a small slit in a sandwich baggie and used that. Make sure that the rubber bands are really snug up against the stitching. This will keep the shape from bleeding out too much.

Hold the center of the shirt in place and spin the fabric around in a circle to wrap it into a tight spiral. Then, put several rubber bands around the bunch to keep it in place. The spots where the rubber bands are will be the white part of the shirt. I used several thick rubber bands together.


Tie Dye Prep Work

Prepare your dye. You want to wait until you are ready to start applying the color before you mix your tie dye powder with water. It will begin to loose potency after about 50 minutes. I used this awesome tie dye kit that you can find online or at your local craft store. The bottles were pre-filled with colored powder and all I had to do was add water and they were ready to go. I was very happy with the way the colors turned out. They were all very vibrant.


Put on plastic gloves for the dying process. You will be glad you did. Cover the table with a plastic cloth. Start coloring your shirt with the Mickey shape first. Add enough dye to saturate the fabric without getting overly soggy and drippy. I let my kids do this part on their own because I wanted to see how the shirts would really turn out if a family did this project at home. My kids were all able to do this part without assistance and their shirts turned out pretty cute. I can easily recommend it to anyone.


Then, put color onto the different sections of the shirt. Each area of the shirt that is sectioned off with a rubber band should get a different color. Make sure to apply enough color to saturate through to the center of the fabric. Check the back and add color to any area that is left white.


Let Tie Die Mickey Shirts Sit Overnight

When you are finished applying the dye, wrap the shirts individually in plastic bags. Let them sit overnight (at least 12 hours) before you wash out the dye. Wash the shirts separately from any other items in the washing machine on the setting with the highest water quantity.

Seeing how each shirt turned out was very exciting! Ours were all unique. Some of the Mickey faces turned out better than others. I think that small close stitches with the dental floss makes a big difference. Also, making sure that the rubber bands are really tight around the Mickey shape is important. Each of my kids were happy with their finished product!


I hope you enjoy making your own Mickey Mouse tie dye shirts! Make it even more magical and listen to Disney music as you dye. And of course, I hope you wear them at the World of Color show to celebrate! If you haven't booked your Disneyland vacation, check out our Disneyland vacations or call 855-GET-AWAY.


Check out these other great articles and ideas:

DIY Mickey Mouse Ice Cream Bars
Make Your Own Disney Fireworks at Home
21 Things to do at Disneyland This Summer
25 Tips for the Disneyland Diamond Celebration


Join the Conversation!

Leave A Comment
0 Comments

Leave a Comment