
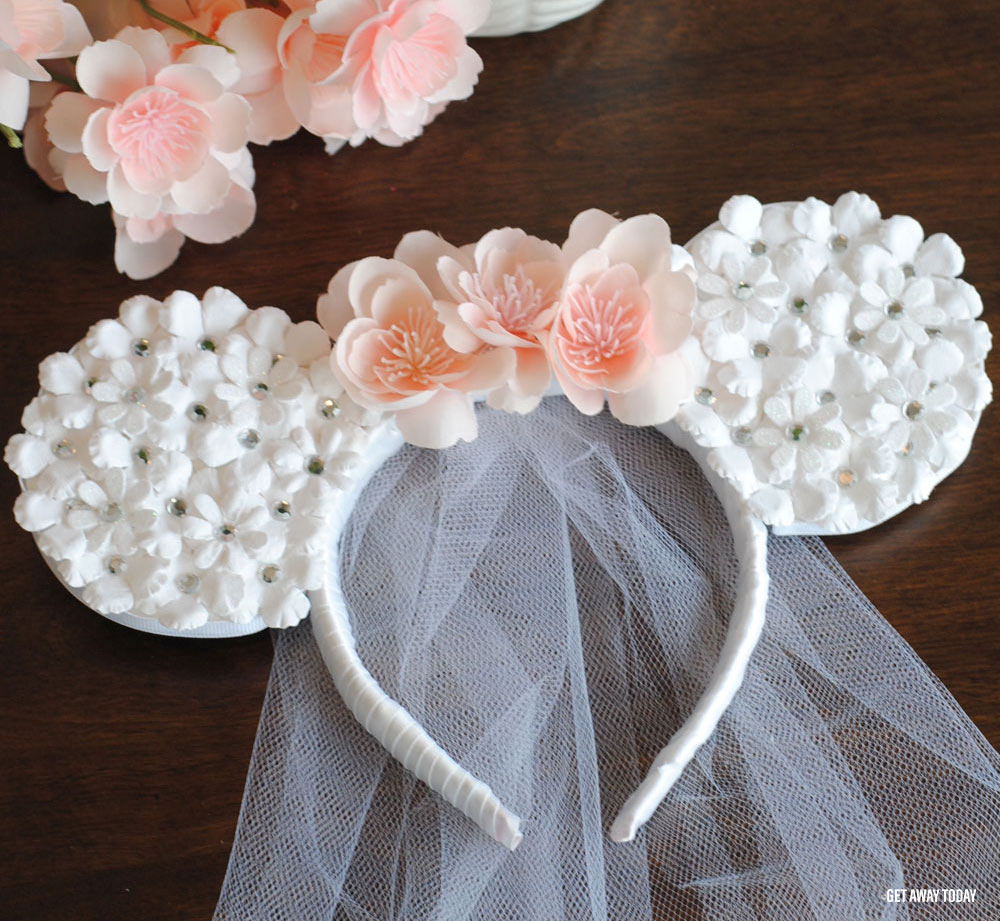
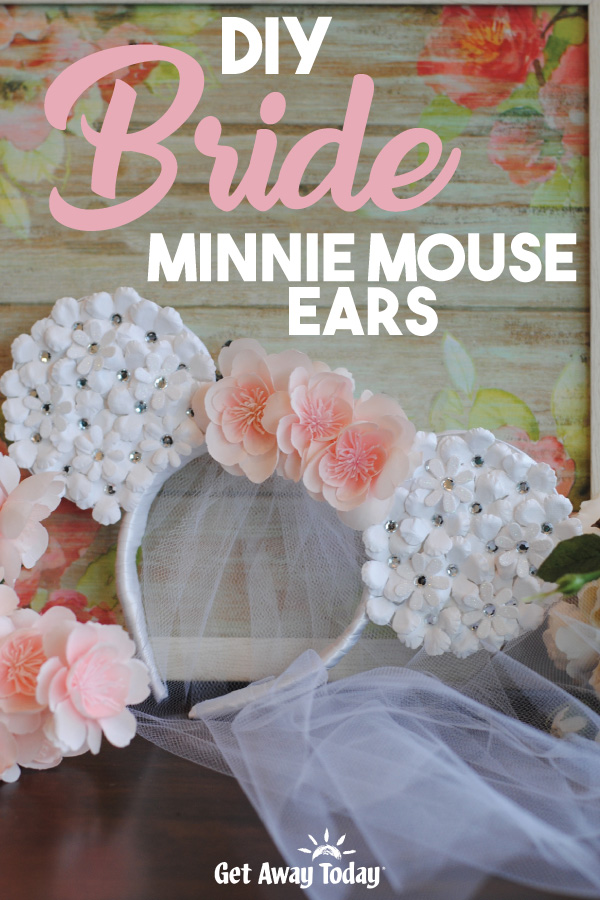
Bride Minnie Mouse Ears
Disneyland is a popular destination for happy life events! Weddings are no exception! If you are heading to the Disney Parks to celebrate your marriage, then you need these adorable ears! Whether it is for a bridal party or a honeymoon, these Bride Minnie Mouse Ears are going to add just the right Disney touch to your celebration! Get ready to sparkle and shine with your own pair of Bride Minnie Mouse Ears. Are you ready to get crafting?
Bride Minnie Mouse Ears Supplies:
- 2 Headbands
- Hot Glue
- Thick White Foam Sheet
- 1/4 inch White Ribbon (about 20 inches)
- 1/2 inch White Ribbon (about two yards)
- White Paper Flowers (Two packages)
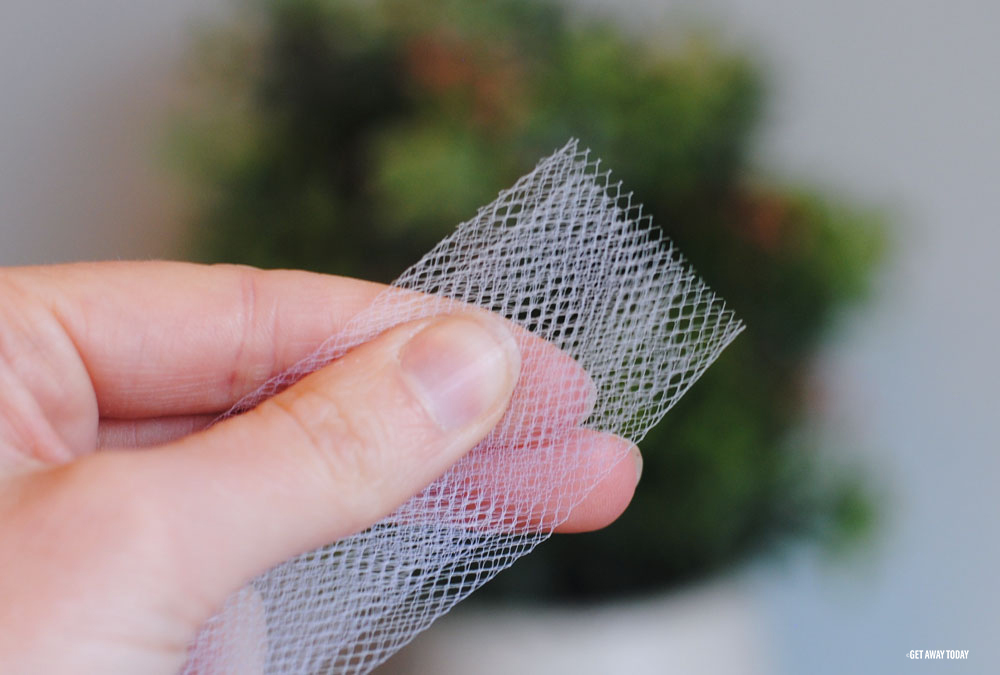
- White Tulle
- Three Pink Fake Flowers
- Scissors
I have made a lot of Minnie Mouse Ears over the years. Minnie Ears are one of my very favorite things to craft. There are so many options for style and design. These Bride Minnie Mouse Ears are some of my very favorite. You are going to love making them. I promise!
Bride Minnie Mouse Ears - Getting Started
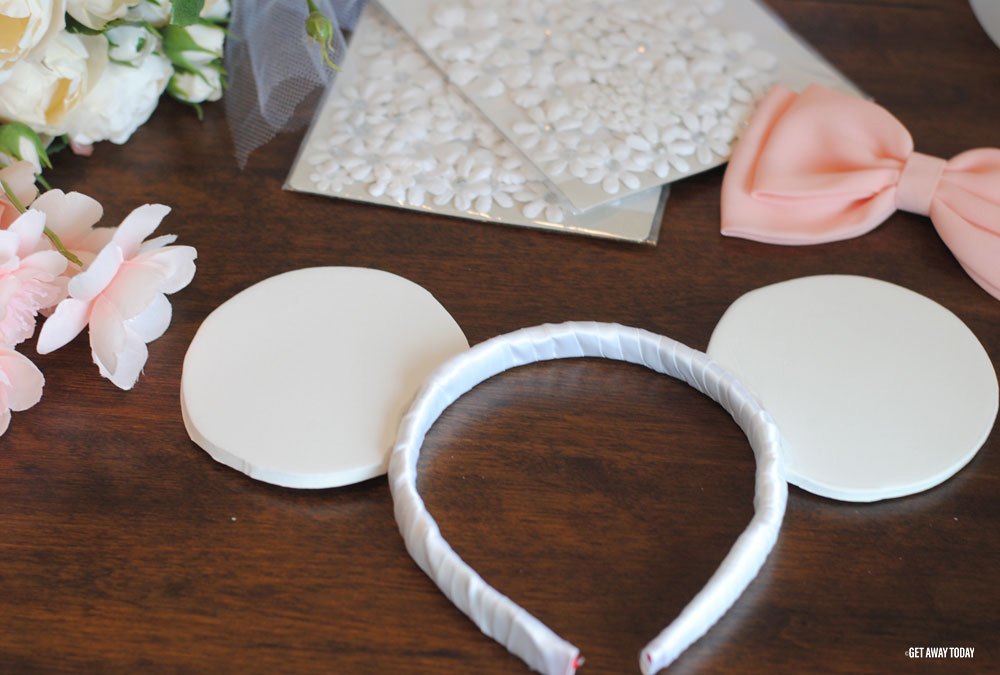
Start by tracing two circles onto a thick white foam sheet. You can find the thick foam sheets at Michaels. They are a little bit thicker than the standard kind that is sold at Walmart. If you can just find the thin kind, then double the foam up to make it twice as thick.
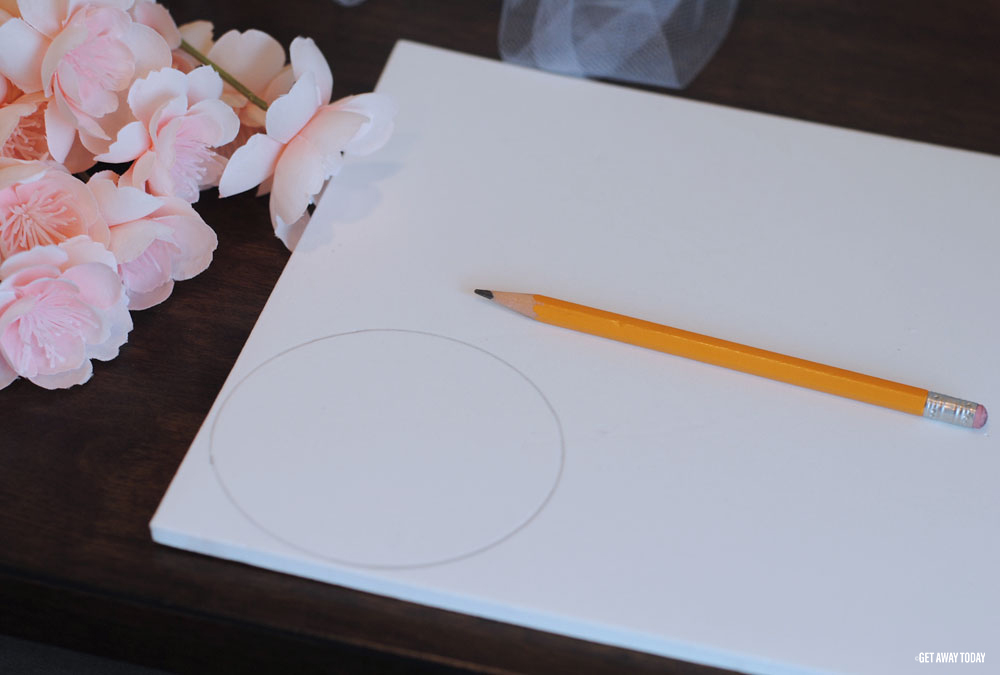
The circles should be about 4 inches in diameter. I traced a lotion bottle. You could use a glass from the kitchen or a mason jar. Anything round that is about that size will do!
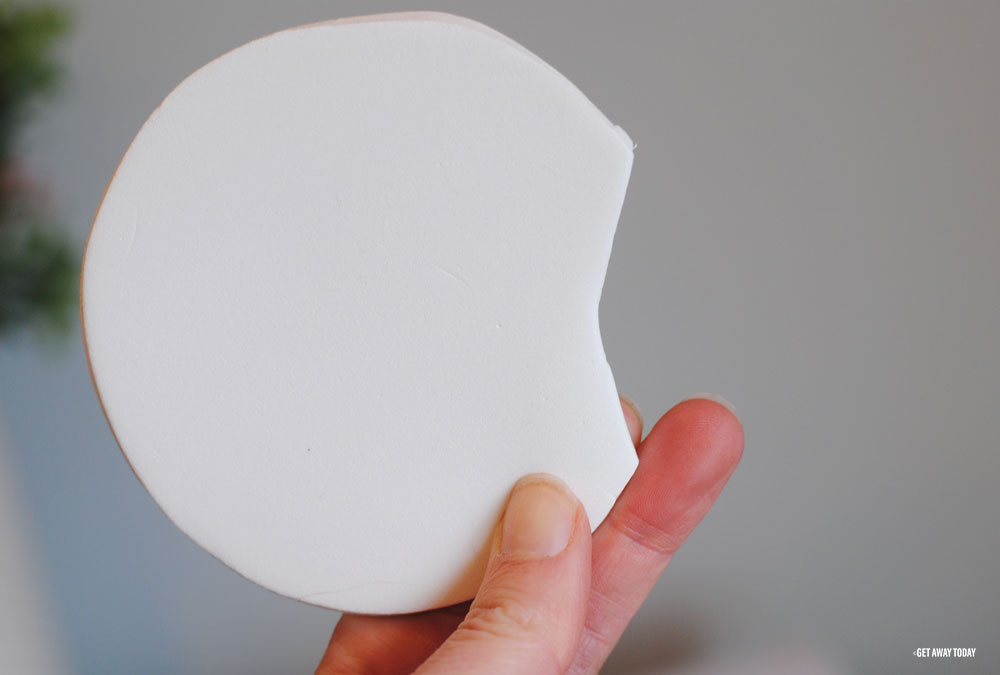
Cut the circles out with sharp scissors. Then, snip a little swoosh out of one side so they are curved.
Bride Minnie Mouse Ears - Embellishments
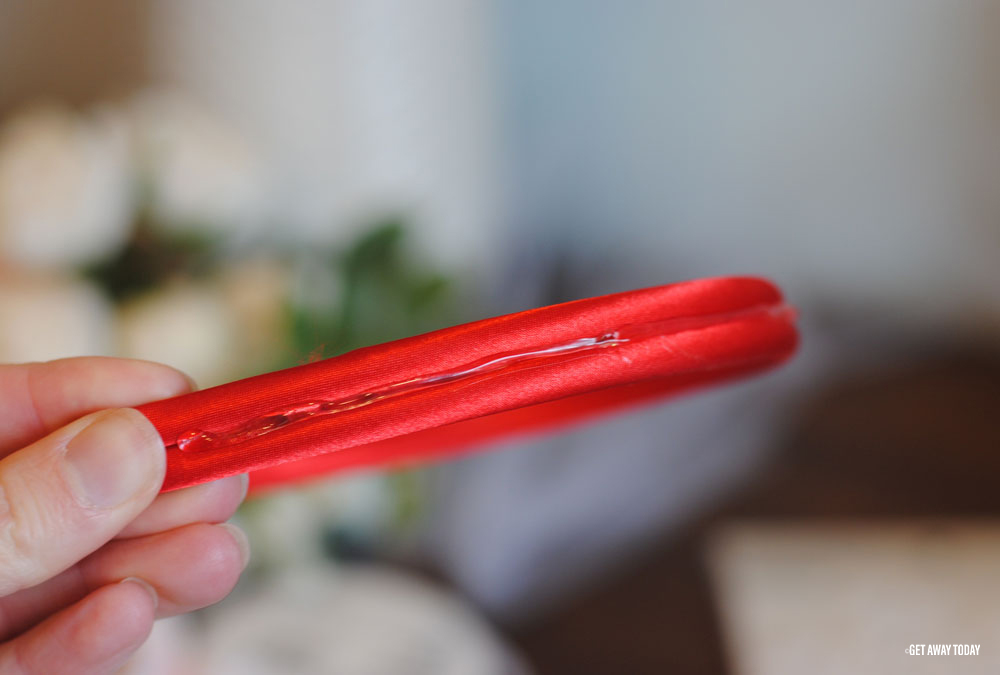
Set the Minnie Ears aside for a minute. It's time to fancy up the headband! I picked up some headbands at Walmart that were only $1 each. They are kind of thin and lame. That is ok! They are going to get covered up.
Glue the two headbands together with hot glue. Squeeze them tight as the glue dries to make sure the two bands stay lined up well.
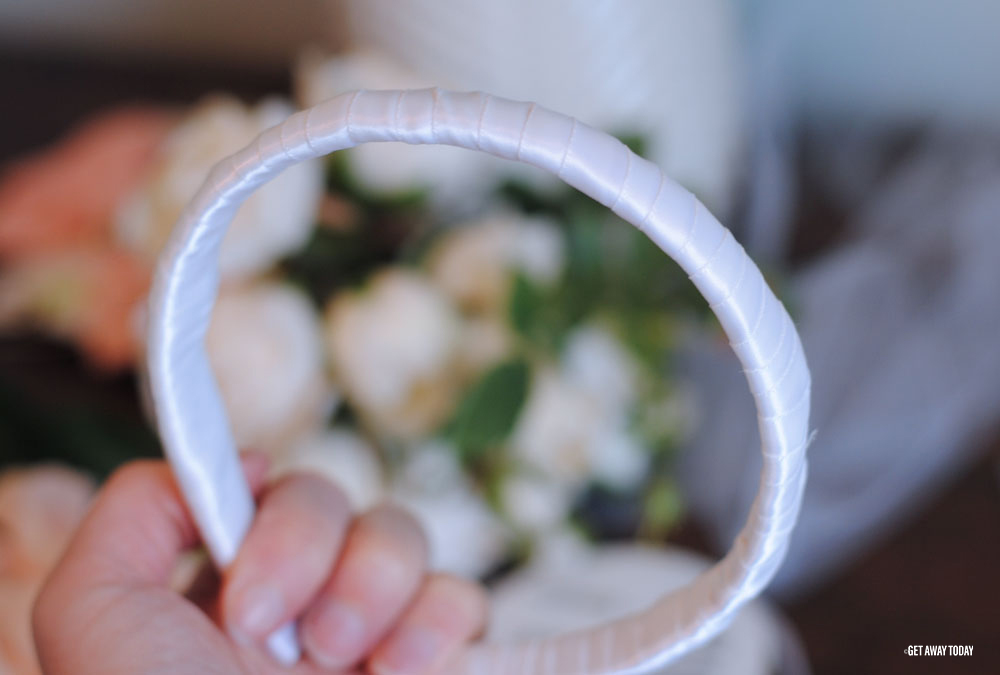
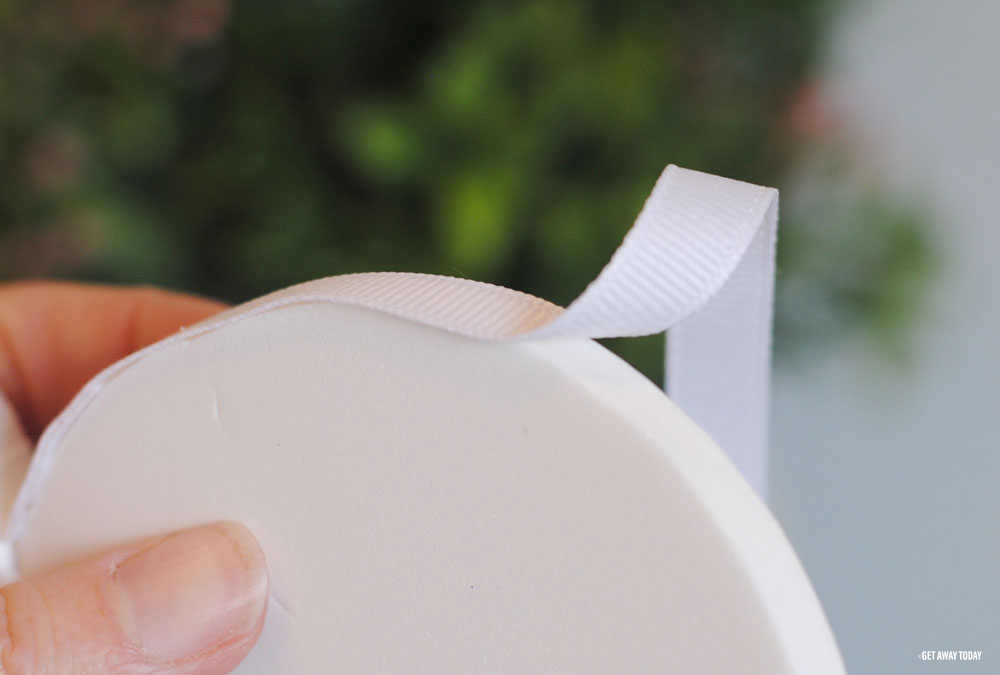
White is a good color for weddings! Wrap the headbands in white ribbon. Put some hot glue at the end of the band and attach the ribbon.
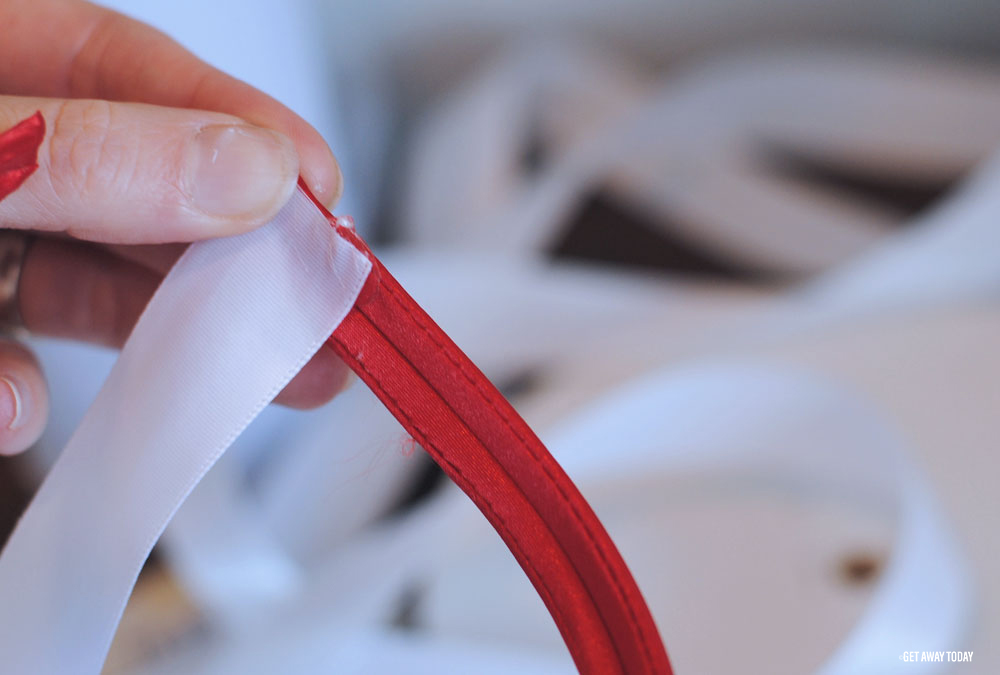
Wrap the ribbon around the headband over and over again. Overlap the ribbon quite a bit with each rotation. Add dots of glue on the inside of the headband about every inch or so to keep the ribbon in place. After you have covered the whole headband, tuck the end of the ribbon over and glue it in place to make a nice clean finished edge.
Bride Minnie Mouse Ears - Assembly
Next, add the white foam ears to the pretty headband. Lay the headband down and put the ears in place before you glue them so you can see where they need to go. Leave about three inches of space between the two ears.
Drag a strip of hot glue along the curved snip and press it in place on the center of the headband. Hold the ear in place while the glue hardens. The foam kind of melts and squishes right onto the headband. It's awesome.
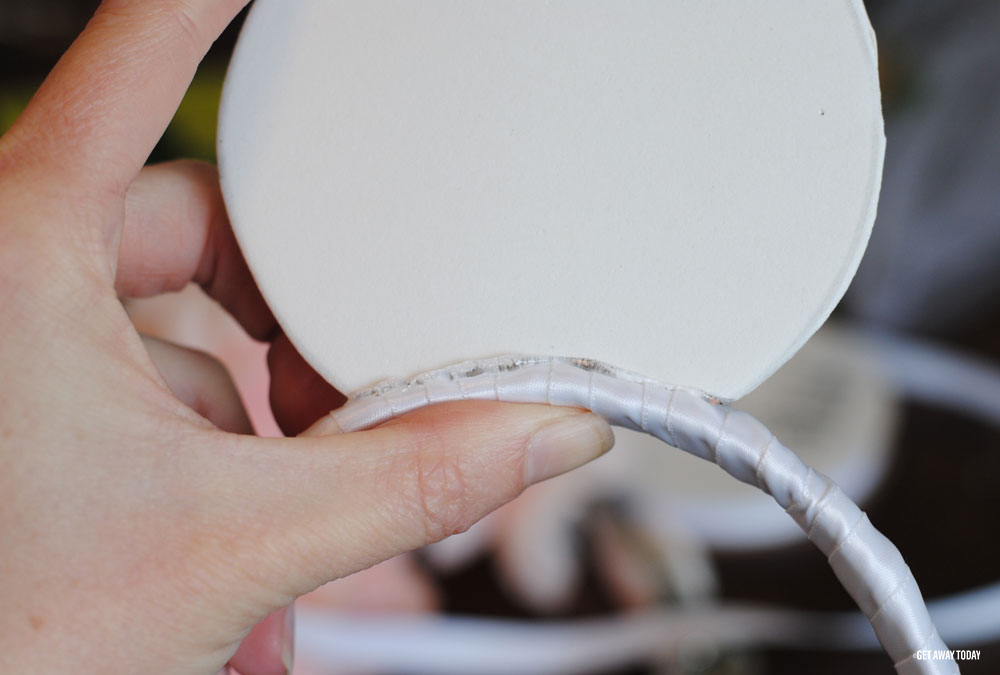
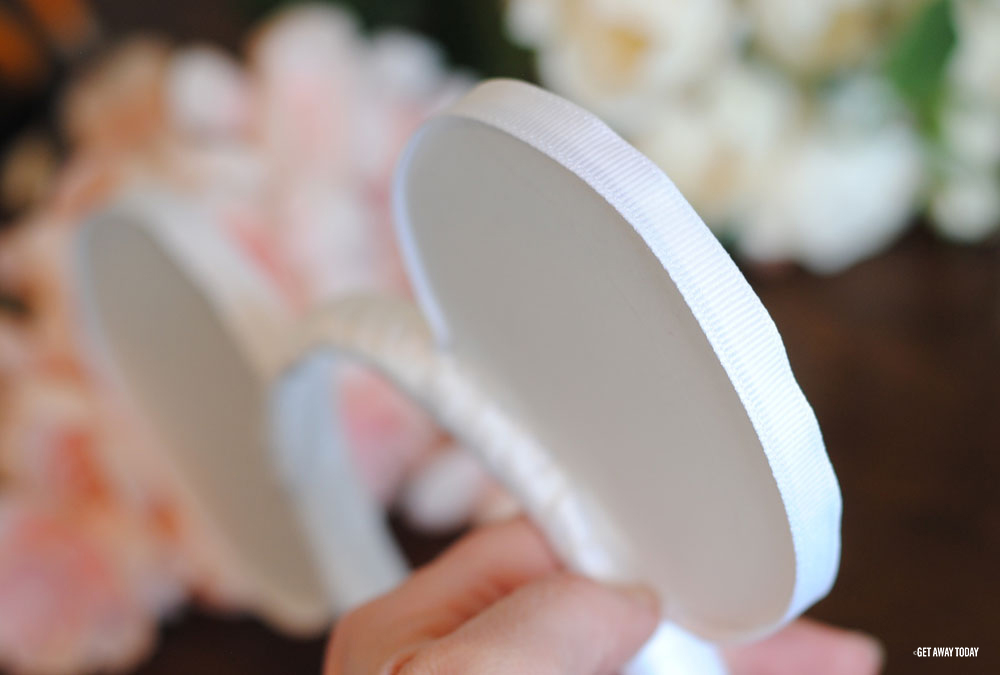
Now, cover the outside edge of the Bride Minnie Mouse ears with thin white ribbon. Start at the base where the ear meets the headband. Tuck the ribbon under to hide the cut edge. Glue it all the way around the ear. Tuck and hide the finished end of the other side of the ear.
This just makes the ears look clean and professional. It also hides any choppy edge made when cutting the foam!
Bride Minnie Mouse Ears - Finishing Up
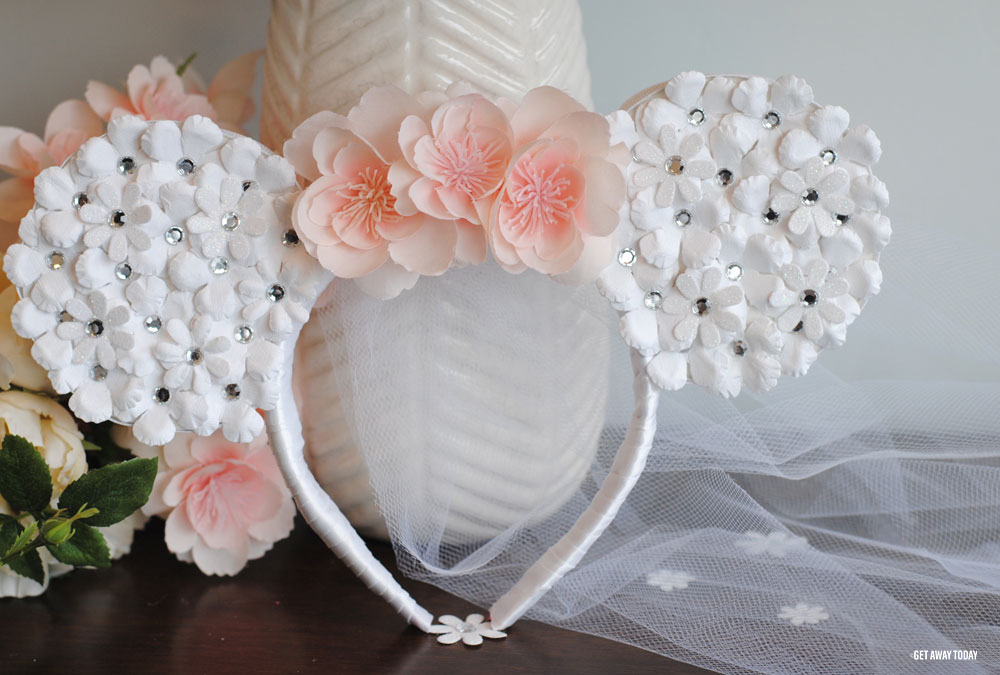
Now for the fun part...decorating! I found these white paper flowers at Michaels Craft store. They were located next to the scrapbooking paper. I loved that they had little sparkly gems and glitter. They are also super lightweight. Perfect for DIY Bride Minnie Mouse Ears.
Lay the flowers out on the front of the Minnie ears. Play with the arrangement until you are happy with the look. I wanted a ton of flowers on mine. So, I really squeezed them in tight.

When you like how your Bride Minnie Mouse Ears look, place a dot of hot glue on the back of each paper flower and attach it to the foam. They stick on super fast.
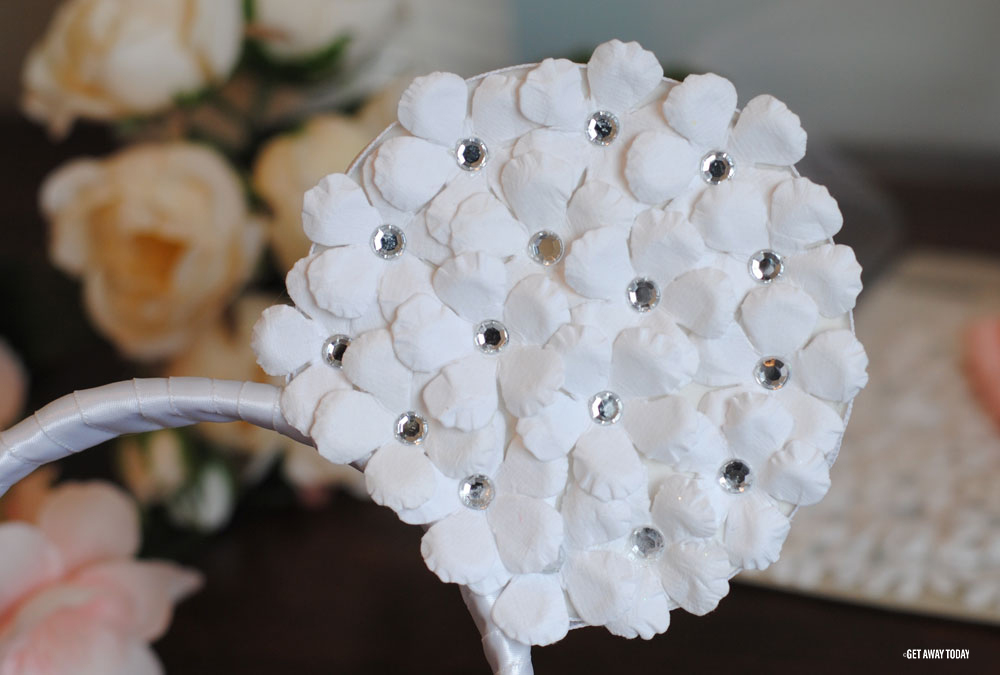
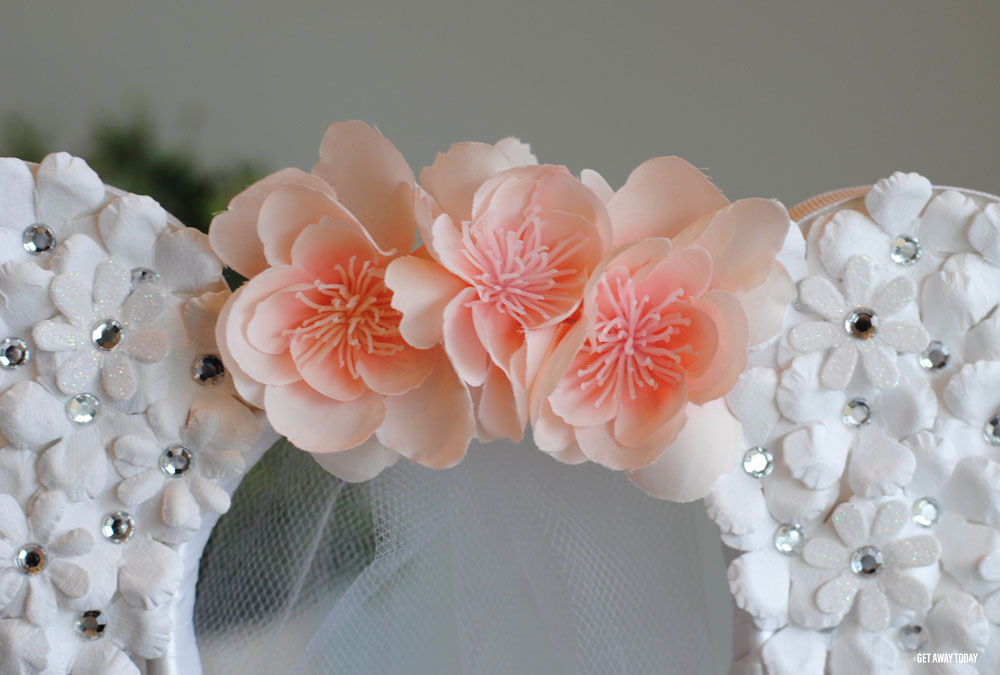
There were several sizes and designs of flowers in the package of paper flowers, so I put a second layer of them on my Minnie Ears. The little sparkly ones looked cute on top! You can see them if you look closely at the finished version.
Bride Minnie Mouse Ears - Adding the Veil
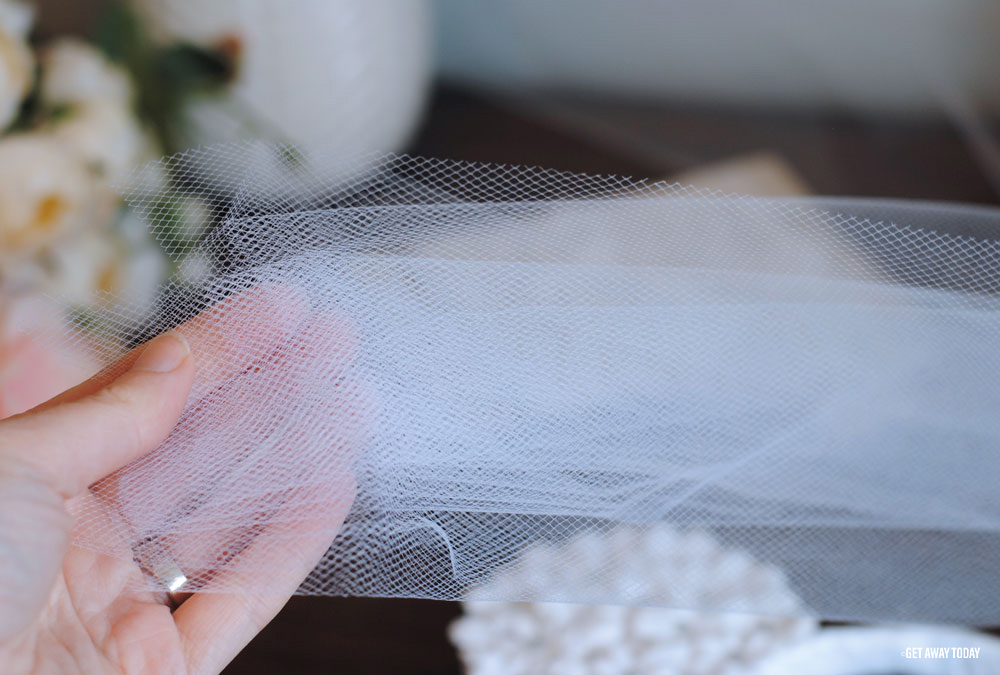
The next step is to make these ears a little bit more bridal! Add a veil. I just love this part too. Use a roll of white tulle. Cut six 15 inch strips of tulle.
You will add each strip individually to the top of the Bride Minnie Mouse Ears. Fold the top of a strip into fourths so it is narrow at the top.
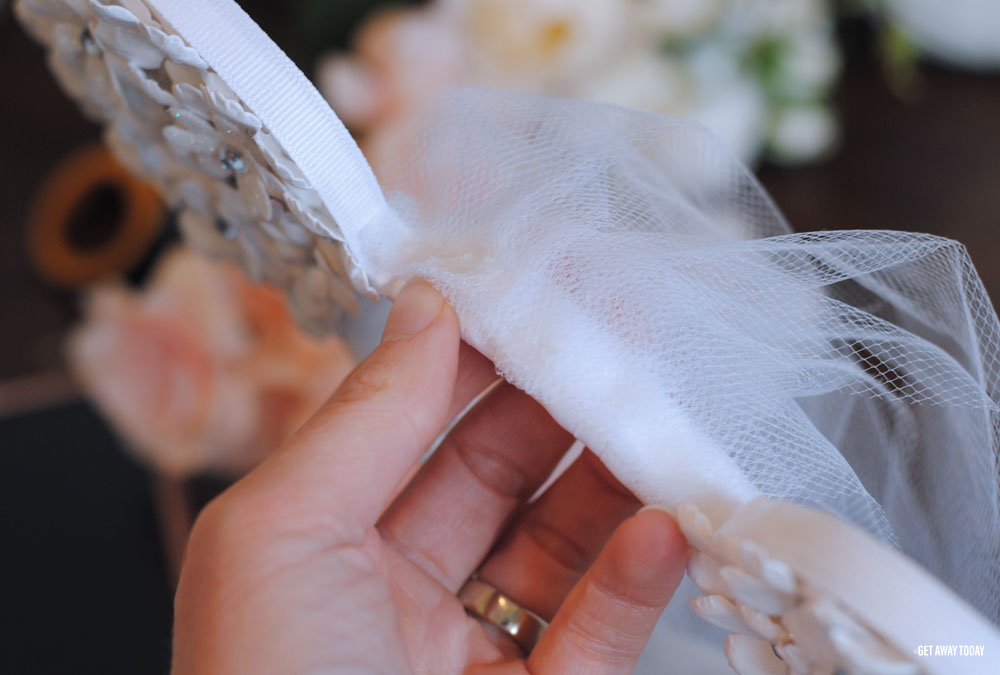
Then, bend the top edge under itself by about 1/2 an inch so you don't have a rough finish. Glue the folded portion onto the headband starting right next to the edge of one of the ears. The tulle should be attached so that it flows towards the back of the Bride Minnie Mouse ears.
Continue to fold each strip of tulle into fourths and tuck under the top edge. Glue each section onto the headband overlapping the pervious tulle strip by about 1/2 inch. Be careful not to burn your fingers on the glue as you hold the fabric in place. The glue does seep through the holes in the tulle.
It should look like this when you are finished.
Now for the accents. I like flowers! So, I bought some happy pink flowers to attach. What bride doesn't like flowers on her big day? If you want to add a big Minnie bow to the center of the ears, that would work too!
Pull the flowers off of the long green stems.
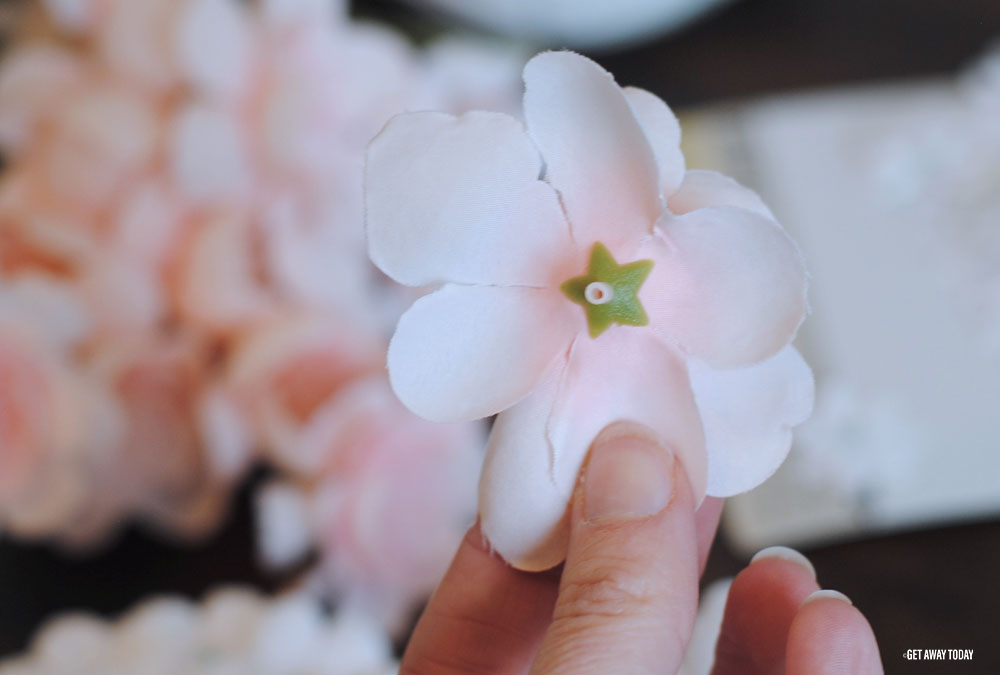
Add a blob of hot glue to the little plastic stem on the back of the flower and press it onto the top of the headband over the tulle veil. Add as many flowers as it takes to fill the space and look pretty. I used three.
Guess what? You are finished!
Your Bride Minnie Mouse Ears are ready to say "I do!" Wear them during a bachelorette party at the Happiest Place on Earth or on your honeymoon at the Disney Parks. You will feel like a true princess. I think it's pretty much mandatory to have some adorable Minnie bling to celebrate your big day! Enjoy being in the spotlight.
Wouldn't it be fun to wear these at a bridal shower IN DISNEYLAND? If you're ready to book Disneyland tickets in anticipation of your big day, then check out Get Away Today's vacation packages. See them all online, or give one of our agents a call at 855-GET-AWAY. We love helping you plan your vacation, whether it's for a special occassion or "just because!"


Join the Conversation!
Leave A Comment